Showing posts with label Printables. Show all posts

Sunday, June 1, 2014

End of Year Favorite Book Activity


First, let us all take a minute to admire the creativity of this post title!  I am so lame at coming up with post titles. Most of the time I just put up the topic.  So, can you tell that this post is about an end of the year favorite book activity? :-)

As you may know, I teach in a building that was a middle school prior to being an elementary school.  This is why the hallway I teach in is lined with lockers instead of bulletin boards.  The kids use them as cubbies with no locks which is kind of nice because it keeps a lot of coat and book bag clutter out of the classroom itself.  However, it does pose a problem for displaying things.  We are constantly vertically challenged!  Whatever you put out has to fit on a locker, and you can't overlap because the kids need to be able to open them.  I've posted here and here about some different ways I've used vertical displays on the lockers.

The end of the year favorite book part was an idea I had to have our entire hallway do a common display for the end of the year and encourage summer reading.  What if each child in every class told about the most favorite book they read this year?  We would have a long hallway full of book suggestions for summer reading.  I made this big display at one end of the hallway on a bank of lockers that isn't in use.

I designed a sheet where each child could tell a bit about their favorite book and design the cover.

If you want to get lots of teachers involved in a project, make it as little work as possible for them and something they can do easily! I made a class set of copies for each classroom and a quick Power Point that teachers could use to explain the activity.   Teachers could have students do this activity in class or for homework.  I was really happy that almost everyone was on board!


The kids did a great job.  It was an activity that spanned every reading and interest level, so all could participate.

In addition to the activity sheet, I made a quick poster for each teacher to hang outside their room with some summer cut-outs I picked up at the dollar store.  Since this was just for use in our hallway, will be thrown out at the end of June, and are not for sale or anything like that, I just googled different summer reading clip art to make some simple posters. It is a long hallway, so I thought this would help keep it all more cohesive.

When done, each class hung their posters on the lockers and we had a long hallway of book recommendations.  There are 15 classes on this hallway with about 25 kids per a class.  That is a hallway of 375 book recommendations!  The last thing I did was create a quick book list sheet where teachers could take their classes on a book walk to "shop" for books they might like to read this summer based on classmates recommendations.  Give each kid a clipboard and the blank sheet and they can walk around and read the hall to create their own personalized book list.


Finally, that big sun I made for the end of the hallway?  Turned out to be a little easier than I thought.  I projected the image on my Pro Board and hung some yellow fadeless bulletin board paper to trace it on.  

The only problem was, once I traced it I couldn't figure out how to get the blue book, white teeth, and sunglasses.  I thought it would look kind of messy if I colored it in.  Then, I looked over at my science tub and saw a roll of wax paper!  Now, you may already know this trick but when I realized I could trace the shape of the book on wax paper and then use that as a template to cut it out in blue paper, I was delighted.  Once I cut out the blue paper, I just glued it on the yellow paper.  I did the same for the teeth using white paper and the sunglasses using tin foil.  I wish someone had shared this wax paper trick with me years ago!  As I've written before, I'm a teacher just not an art teacher!  

If you would like a copy of the blank book form, you can download it here. It should be printed on 8.5" by 14" paper. The font is a little different than what you see in the photos, but still the same content. Well, except that the only one I saved is the original which says, "The Best Book I Read This Year."  I did revise it to say, "The Best Book I've Read This Year." So, if the I instead of I've will bug you like it did me, don't download it! Sorry, but for some reason I didn't save the revised copy.  So, that is the not-so-cleverly-titled "End of Year Favorite Book Activity."


Saturday, October 12, 2013

Carpet Manners - FREEBIE

I have a nice, big carpet in my meeting area for my friends to sit on.  When I had a full class of 5th graders, we always had to sit close together.  The biggest problem was making room for each other and keeping our hands and feet to ourselves.

This year, I meet with about eight students on the carpet.  That would be eight students max.  This leaves plenty of room to spread out and create some new problems that I never really had with a full class.  Problems like kids sitting way at the back of the carpet no matter how many times I remind them to move up.  I even had one child rolling around on the carpet during the lesson. Rolling as in tucking his legs and arms and rolling like a Weebles from one end to the other!  This called for some carpet rules STAT! Here's the poster I made that is taped to the bottom of my chart stand.


Rather than come up with more rules, I went with carpet manners. Manners sends the message that it is all about being polite to others and ready to learn!  I'm sure we all have different behaviors we expect, but for my kids these seemed to be the ones that were most needed.


1. Sit Pretzel Style - There was a lot of lying down on tummies or on their sides with head propped up in their hand.  I'm okay with this for some carpet work but not when I'm giving direct instruction.  We also sit M&M style sometimes, but I didn't add that to the poster.  This is an example of what we call M&M sitting, even though its just one M:

I think it is sometimes called a W position, but M&M sounds more fun!  I have some kids that prefer to sit this way.  Honestly, I would have to break some bones to make my legs do this now!  :-) It is totally for young knees only!

2.  Face the Speaker - This means the teacher or turning to any other person speaking. With my small group, we usually sit in a semi-circle so that helps this work a lot.

3.  Place Materials in Front - Notebooks, pencils, novels, etc. sit on the carpet in front of you until needed.

4.  Listen Actively - I had fun modeling what active listening does and does not look like with the kids.  They were completely offended when I turned away from them and started looking around the room or looked down and began playing with my shoes while they were talking to me! Got my point across rather quickly!

5.  Raise our Hands to Speak - I don't always need this one as with such small groups we often have more natural conversations that don't require hand raising.

The poster is just a Word document on two pages that I printed, taped together, and laminated.  If you would like a copy of Carpet Manners for your own, you can download it by clicking HERE.

Thursday, October 10, 2013

Check Marks to "Stop and Check-In"

Me:  You just read this page.  Can you tell me a little about what you know?
Student: Ummmmm. . . . (Insert wait time here.)
Me:  I know you were really interested in reading this book when you chose it.  Who did you read about on this page?
(Insert more wait time.)
Student:  A boy? (Yes, answered as a question.)
Me:  Hmmm, can you tell me a bit about the boy? What was he doing?
Student: Ummmmm. . . . 
(Insert lots more wait time here to be followed by 
major prompting that led to more answers phrased as questions.)

And, this would be why we revisited the "Stop and Check-In" strategy yet again! I find that my friends (reluctant readers) have a habit of reading straight through without really stopping to check comprehension. This led me back to revisiting the Stop and Check-In strategy.  

It is always amusing to me that I really have to explain why this strategy is so important for reading. In explaining it, I try to find a way to make it relatable to them so it isn't just another thing a teacher tells them they should do when reading.  I asked my friends to imagine that they had broken their favorite game system. They take it to be repaired, but the two repairmen have never fixed one before.  So, they promise they will read up on it and learn how to fix it.  One repair man reads the book but doesn't really understand what he's reading.  He decides to just keep reading and hope he understands at the end.  The other repair man stops every couple of pages to make sure he understands what he read.  Only when he thinks he understands does he keep reading.  The next day, both offer to fix your game system.  Who do you want to fix it?

Without fail, every single student wants the man who stopped and checked-in while he was reading to fix their game system.  When I ask why they tell me all the wonderful reasons that make this strategy so helpful to them  He will remember what he read.  He understands what he read, so he will know how to fix it better.  The other guy will mess it up because he didn't understand anything.  From there, it is so easy for them to connect how this same strategy helps them as readers and test takers. I sort of hate that I have to even mention the latter, but it seems to be our reality these days.

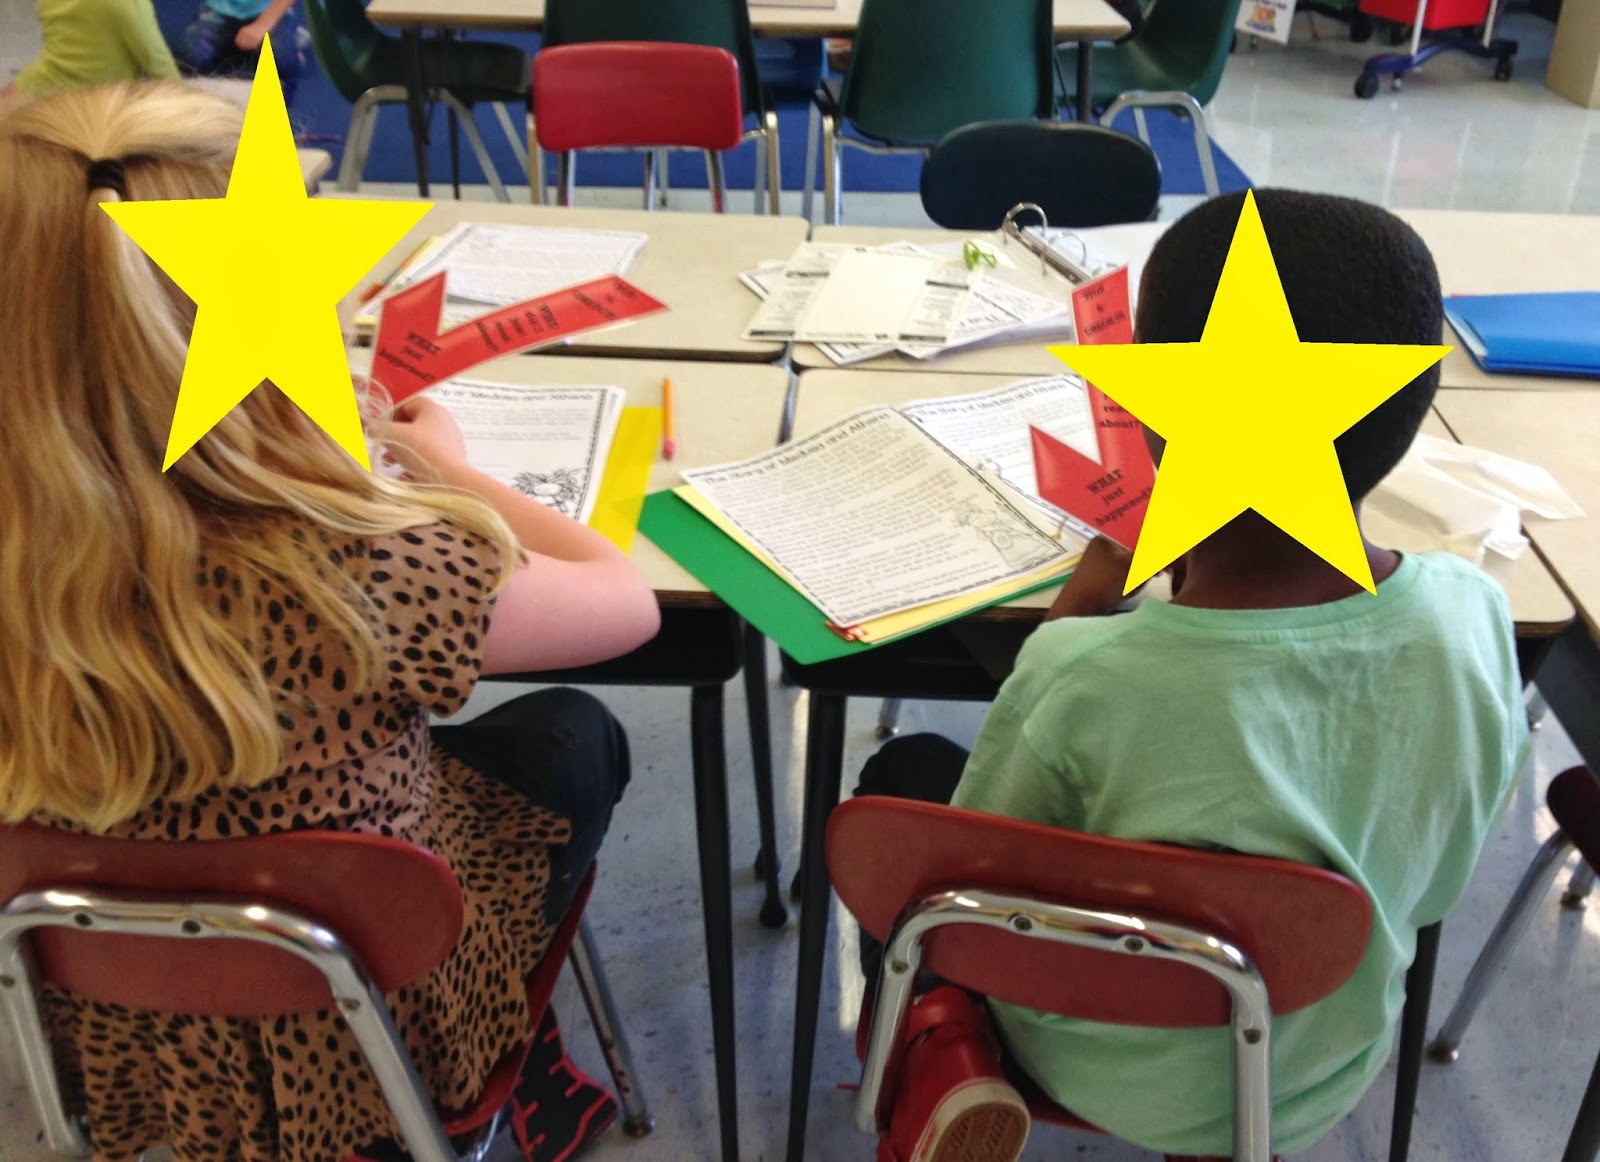
To make the strategy more concrete, I made check marks using two basic questions as found in The Cafe Book: Who did I just read about? What just happened? Two short and sweet basic questions that force them to self-monitor and check for comprehension. Here's a link to their Ready Reference Form that explains the strategy in-depth. 

The Cafe sisters had a parent make balsa wood check marks, but seriously? How many of us can do that?!! I don't think I would even want that.  Mine were made using clip art and text boxes.  I just printed them on card stock and laminated them.  The laminating turned out to be especially important.  One of my poor friends has been a sneezing, snuffling, nose-drippy mess all week and my check mark was certainly not spared! I actually took the laminated check mark to the bathroom to wash before using it with the next group! Here's to hoping my little friend is feeling better soon. 

I modeled the strategy with a friend first.  Then, when it came time to practice, we used one of our reading selections in which we marked stopping points.  Then, I paired up each student.  Student A read aloud to student B.  When they reached the stopping point, student B would hold up their check mark and say, "Stop and Check-In!"  Student A would then briefly retell by answering those two questions.  Student B had to listen to make sure student A didn't leave anything important out or misinterpret what was read. If that happened, they helped out. They would then switch roles for the next section of text.

I'm well aware that I'm not sharing anything new here. Many others have blogged about it before this. The strategy has certainly been around forever, but it is well worth mentioning as it is so very effective.  I think that the physical action of holding up the check mark and saying, "Stop and Check-In!" aloud was especially helpful to my friends.  It helped to cement the idea in their minds. 


We then used the strategy independently the next day with their independent reading books which had sticky notes placed at strategic stopping points.  They did a quick jot on the sticky to stop and check-in when they got to that point.  A quick and easy way to assess how well they are using the strategy.

Unfortunately I can't share the bookmark I made because it wasn't until after I made, printed, and laminated them that I saw the check mark had a very, very, very faint watermark.  But, I did search for some that you might like.
If none of these work for you, it really couldn't be easier to make your own. You could even draw one on card stock using colored Sharpies.  Quick and easy!


Sunday, September 8, 2013

Reading Response Form Letters for Upper Elementary Students: Beginner Level

Recently, I received this email from a reader:
Hi there, I have been following your blog for quite sometime and would like to ask a quick question of you.  I have been using reading response notebooks/letters with my 5th graders for 8 years now and am still struggling with what is the best accommodation for my inclusion special education students.  I have 5 students this year with limited writing abilities. Do you use a cloze template for them to fill in?  If so, so you have an example one?  We have used verbal response, a scribe, cloze paragraphs, shortened response, etc. and I'm still wanting something a little bit different.  Thanks for your help and hope your school year is going well.    
There was a huge response to my posts back in 2011 on how I did my reading response letters back then. I had posted explaining how I set up my reading notebooks. I also did two separate posts on how I modeled writing a reading response letter, here and here.  At the time, I was working with enrichment students who had no difficulty in writing those letters.  Currently, I work primarily with students who sometimes have significant difficulty in writing even the most basic of response letters. While they aren't special education students, I completely understand the situation that email stems from!
Thesis Statement

As I worked more and more with my new students, I could see that they definitely needed more support in writing the letters.  As I noted, they weren't inclusion special education students, but there were still  many for whom the task was just too overwhelming. Cognitively, it was too much to put together.  There was deciding what to write about, then connecting that writing topic to selected information from the book to include in the letter.  There was getting all that thought together, and then putting it all in the specific format of a friendly letter.  For children who are struggling readers and writers, this is a tremendous task.

To help those students, I created a number of reading response form letters that address some different thinking stems (comprehension strategies.)  There is nothing cutesy about these letters.  I didn't put in borders, clip art, or use fancy fonts.  It's a basic form letter to fill in.  There's a reason for this.  My goal is that eventually my students are able to take a plain piece of lined paper and generate a letter on their own. I want my form letter to look very much the way the letter will eventually look in their notebook or lined paper. I also wanted nothing visually distracting.  I am focused on the content, and since I'm asking them to write in letter form, providing the format.  Content is exactly what my plain form letters focus on and modeling the format provides familiarity with it as they use the forms.


There are 13 letters in all that focus on setting, character, plot, making connections, asking questions, visualizing, inferring, predicting, plot, summarizing, synthesizing, an open response for fiction and non-fiction.
You can download the letters by clicking HERE.   It is a PDF that I uploaded in to Google Docs.  There shouldn't be any problems downloading them, but I know there are always a few people who have some trouble with it. For that, I apologize.  I would love to trouble shoot that for you, but my tech skills are just not that advanced! :-)

These letters are meant to be a tool in helping our students transition to writing independently.  However, there are students that will need extended time using these letter forms.  There are students that will need these types of forms for most of the year, if not all year.  That's okay!  It depends on the child's needs.

Now, let me tell you why you may not want to use the letters at all!

I do want to note that I strongly suggest not getting caught up in letter writing as your only form of reading response.  For upper elementary students, I like it because it is a way to organize their thoughts in a form (paragraphing) that will be necessary if not required as they head to middle school. But never forget that the content is of primary importance.

If you have a student that simply can't master using friendly letter format independently no matter how many times you show them or they practice using it, stop requiring it of that student.  At least for a while.  After all, you are asking for these responses to see if students are effectively applying reading strategies, if they are monitoring for comprehension, if they are extending their thinking. Think about what the goal is here.  It's not to see if they can write a friendly letter.  When the letter just isn't working, we may need to start providing variety in their reading response opportunities.

We've often been told our students need to be writing reading response LETTERS.  And, hopefully if you are doing that these form letters are helpful to you.  But, what they should be telling us is that students need to respond to their reading.  That response can and should take many forms and be as varied as your students' needs. Some alternate responses to a letter format response include:
  • Conferencing - A conference discussing the book where a teacher takes anecdotal notes can be very useful for students who simply have difficulty getting the hand to write what he brain knows!
  • Graphic Organizers - Some students need the visual organization a graphic organizer provides.  They also often allow a student who is limited in writing stamina to give specific, succinct answers in each section.
  • Identify Key Words - There are a few ways to do this. Here are two examples.  One way could be, if you are looking for the student to respond with character analysis, to jot down three or four character traits on a piece of paper.  Have the student circle one and at the bottom of the page explain why they chose that trait.  Of course, you want them to explain what in the text makes them choose that word.  The support comes in that you have provided the possible character traits.  Another way to do it for non-fiction is to jot down a few words related to the topic.  Have the student choose the word that is most important to the book and tell why.  This is definitely higher level thinking.  We aren't trying to get away from higher level thinking, but instead looking for other ways to show it beyond a reading letter.
  • Sketching - Have the student sketch the most important scene and explain what is happening and why it was important.  Or, have them sketch and label the character.  They can label with three things we can see and three things we know but can't see.   Notice I said sketch, not draw.  It is not meant to be an art project but a reading response.  A quick sketch should do the trick!   
  • Record It - Write some general, key comprehension questions on index cards.  Give one or two to a student and have them record their answers verbally.  Hopefully, most schools have simple microphones for the classroom computer that make this easy to do.  
Those are just a few ideas.  Some are easy, and some require a bit more work.  But, what they all do is provide alternate response choices that might better fit the needs and abilities of certain students.  One of the most important things we can remember as teachers is that; 

Fair isn't everyone getting (or doing) the same thing, 
but everyone getting what they need to succeed.  

Reading response letters are just one way of doing it. So, please keep that in mind as you use these letters or if you go back  to my previous posts and follow my reader's notebook letter format.

By the way, if not using the form letters for a weekly reading response letter, throwing some in a folder can make a quick and easy literacy center.  I've also found them useful in my guided reading groups where time is so limited. If you decide to use them, please take a minute to comment and let us all know how.  You never know when your idea may be exactly just what someone else was looking for!


Wednesday, August 14, 2013

Name It! A Game FREEBIE


Many years ago when getting my master's degree, I had to take a theater course.  Don't ask me why!  To this day I still don't get it.  It was a theater class focused on using theater and games in the classroom.  One of the games the professor showed us was Name It!  I have actually played this game for many years with my friends.  It is a fun favorite.

Let me tell you how it is played.  It begins with a set of cards that have various topics written on them.  Have all your friends stand in a circle.  Place one friend and the stack of cards face down (the cards, not your friend!) in the circle.  The friend in the middle picks one card and must name a certain number of whatever the topic is.  For example, they would read aloud, "Name four. . . colors of the rainbow."  Then, the class will pass around a ball.  The friend in the middle has to name the correct amount by the time the ball makes it completely around the circle.  Once the ball gets back to the person who started it, your friend is out of time.  At that point, allow the class to share answers they thought of.  And, that's part of the fun.  Everyone is thinking of possible answers whether they are in the middle or not.  To justify the game, you could always explain that you are busy building schema!

The number of items you want your friends to name can vary.  If you have younger kids or a smaller group of children, you would want to keep the number small.  Larger class and older children can usually name more.  I would keep it between 3 and 5, but try it out and see what works for you.

I rarely play the game for points or winners.  Usually, I just try to get everyone a turn in the middle. You can play for points by breaking the class up into two teams (boys vs. girls, right side of circle vs. left side of circle, etc.) and if they are able to name it all, that person gets a point for their team.

As I mentioned, I've been playing this game for years.  It was hard to come up with categories, so over the years I've allowed my friends to write some they thought of on index cards.  I ended up with a pile of messy index cards that looked like this.

The cards were getting bent and wrinkled, so I thought it was time to clean this up and create a more aesthetically pleasing and durable version.  I took most of the topics my friends thought of and typed them up in a name tag template with a fancy border.  Now, I have this!

I printed the cards on card stock and laminated the pages.  Then, I cut them out and put them all in a file card holder I got at the dollar store.  Below, you can see how it stores nicely and the mini-basketball we use in my class for passing around the circle.

Since I have it all saved, I decided to share it with you.  If you CLICK HERE! you can download the game for yourself.  All together, there are 80 different cards with some blanks for categories you might want to add.  With 80 cards, you can pick and choose the ones you would want to use with your friends depending on age level and number of children playing. I also included a direction sheet with the printable, and I just hope it makes sense when you read it! :-)

One thing you should know.  The cards aren't exactly the same size.  Two of the cards on each page are a little bit bigger than others.  I'm not sure why that is because I used a standard label template, so they should have all been the same size.   It looks huge in the picture at right because it's an extreme close-up, but it's really just a smidgen bigger than the others. The good news is that it is really just aesthetic annoyance and doesn't effect the game.  And, hey! It's FREE!

If you are looking for a more academic related game, I posted another one a while ago called Heart Breakers.  It is a fun review game for any academic subject.  I don't have a printable available for it, but if you read the post you will see it takes minimal time and effort to make the cards you would need.  Heart Breakers is always a popular way to review before a test.    If you decide to play Name It! or Heart Breakers with you friends, stop back and let me know how it goes!

~ : ~ : ~ : ~ : ~ : ~ : ~ : ~ : ~: ~ : ~
Well, school starts in September for my friends and yesterday I finally found out what I will be doing next year.  It is going to be challenging and I anticipate a busy year. I'm not allowed to talk about it yet, but I will soon!  The best news I received was that I don't have to share my classroom with anyone this year.  This allows me to set it up exactly how I want.  Last year, I had to take into account the three other teachers I shared the room with, so it was never really what I wanted it to be.  This year, I have free reign once again! I took some before pictures yesterday so that I can share a before and after of my room with you once I finish. Excited to know my room is going to really be "my" room this year.  Not so excited to have to do all the work involved in making that happen!  I know many of you have started back to school, but I'm still in summer mode!  And on that note, I'm off to go play outside! Have a good day! 

And, yes!  I did notice the excessive use of the exclamation point!  What can I say?  It's my favorite punctuation mark!


Friday, August 9, 2013

Bookmark Freebie and Picture Books

Yesterday was the last day of summer school, and I could not be happier!  I love teaching, but I am ready for some time off!  Today, I have a bookmark to share with you. It was one of the projects my summer school friends completed.


Let me explain two things that prompted me to create the bookmark.

  1. I may have mentioned that the summer school program in my district is focused on literacy.  Students who would benefit from extra literacy instruction over the summer are invited to attend.  This year, I had friends who are entering fourth grade but reading anywhere from 1.5-2.5 years below grade level.  
  2. One of the things all students in our district are required to do is keep a reading log over the summer and turn in the log and a reading project to their new teacher in September.  The projects are quite varied in both type and level, so there is something on that list that every child would be able to complete.  
Now, here's how they come together.  My summer school friends, for the most part, are not independent readers.  They are not picking up a lot of books over the summer.  Many are struggling writers, as well.  So, the tasks of keeping a reading log and completing a reading project without any teacher guidance is a daunting one.

To ease the pain, we read A LOT of fun picture books this summer, both together and independently.  We even did a mini author study of Margie Palatini's books.  Three favorites were Lousy Rotten Stinkin' Grapes, Bedhead, and Piggie Pie!  All were major crowd pleasers!  

Lousy Rotten Stinkin' Grapes is a fun twist on the Aesop fable The Fox and the Grapes.  Great problem/solution story.  Reading all these picture books gave my friends a nice start on their summer reading logs. I know they now have something to turn in when they go back in September even if they don't read another book all August.   Fingers crossed they will!


Then, there was the issue of the required project.   I wanted them to independently reflect on a book of their choosing and have a simple, completed project to take home and turn in with their reading log.  My goal was to keep it simple considering the range of reading and writing abilities.  To accommodate all, I created a very basic bookmark.  The front has room for title, author, and an original illustration.  On the back, there was space to tell their favorite part (and why!) as well as their favorite character and why.  Finally, at the bottom is a little space to tell what their illustration on front shows. I made a model bookmark using the book A Bad Case of Stripes so they could see just what to do.  Here's some of what my friends came up with:


They aren't perfect, but I can tell you a lot of little kid heart and soul went in to getting them done. Below is a picture of the form I made. Remember, I wanted to keep this simple and easy.  The picture is crooked, but I promise the printable is not. 

Each friend was given a copy of the form to draft.  After revisions, mostly trying to get them to add more information and proofreading, they were given a copy I had printed on card stock to do a final copy. When they finished, we folded the paper in half and glued it together.  To finish it all, we hole-punched the top and added some ribbons.

You can print out your own copy of this bookmark by clicking HERE. I have added this bookmark as my first item on Teachers Pay Teachers.  You can still download it for free by clicking HERE! I think this would also make a great center activity.  Just print it out on plain paper and once your friends finish it, they can just fold and glue. You don't have to put the ribbons on top. It would also be a good back-to-school activity where they could create a bookmark to share with the class telling about their all-time favorite book.

That is all! :-)

Wednesday, July 10, 2013

All Star Summer (School) Centers

This week was the beginning of summer school.  It runs Monday-Thursday for twenty days.  I have twenty days to work some magic with my reluctant friends.  It would be nice if I could teach in my own classroom, but they put us all in a school that has air conditioned classrooms.  This means decorating a room that has already been completely packed up with all bulletin boards covered by the homeroom teacher. It makes setting up a bit difficult, but when the trade-off is air conditioning you won't find any complaints here!

Below are a few pics of the star-theme I went with. Overall, I kept things fairly simple on the decorating front. In the pictures you can see through the covered bulletin boards much more than you can standing in the room.


Our summer school program focuses on just literacy, so our day is a blend of guided reading, shared reading, word study, read aloud, independent reading, writing, and centers.  I have eleven friends with me whose reading levels break down into three separate groups.  It actually worked out pretty evenly.  We spend about 30-40 minutes on guided reading, allowing me to see two groups a day.  

The picture below explains how it works.  I will meet with one groups first.  Then, the group I will be meeting with next works on a center activity.  The group I will not be meeting with that day works on centers for the entire time.  Now, they don't really have the stamina to work on a writing center or any other center for that length of time so the rule is they must complete at least one center activity each day.  Then, they have the choice of doing another center activity or finding a spot for independent reading.  Each day, I rotate the group names (the center picture) so that the friends I see and the assigned center activity changes each day.


I thought I would write about the centers I decided to use this year.  My friends are promoted third graders that will be going into fourth grade in September.  Unfortunately, they are all working around a low second grade level.  This means we need a lot of work with the basics, and that is what I had in mind when choosing my centers.  I kept it simple with just three; one for writing, one for word study, and one for reading fluency.  I would love to tell you I sat and made tons of center activites, but I just didn't have time for that!  Instead, I went to Teachers Pay Teachers (TpT) and found three that would meet the needs of my summer school friends while also work for my basic skills friends in September.


Before I go on, let me preface by saying that this is not meant to be an endorsement of TpT, although I do love the site.  Also, the authors of the items below have no idea I'm writing about their products.  As a busy teacher and one who would like to be able to spend at least a little of her summer at the beach, I wasn't looking to reinvent the wheel with original center activities.  And since my materials are all packed away at school,  I was perfectly delighted to go on TpT and be able to find exactly what I was looking for.  I like them so much, I thought I would share them with you today.  So, below are the three items I found that are working well as center activities.  

  • Writing Center

I wanted my friends to just do some basic writing.  They are not yet proficient writers.  I find I'm getting a lot of random sentences on a topic with no coherence.  I'm also finding a lot of need in basic sentence structure.  Having them work on writing topics that are interesting and relevant gives them a place to practice and a place for me to find great teaching points for our conferencing.   

Irene Hines has created a Summer Writing Journal that has twenty days of topics, a word bank of summer words, a variety of summer themed writing paper, and is common core aligned.  What more could I ask for?The clip art used is really cute and summery, too!  I made each friend a booklet, and it became our writing center.  Of course, they always have the choice of free writing in this journal as well. 

  • Word Works Center

This center covers a wide variety of basic skills.  It gives you forty activity cards that ask the students to use their independent reading book to locate ten words (I did modify this to a few less words for some of the cards) that address the particular skill named on the card.  Some of the skills include:  phonics and phonemic awareness, compounds, contractions, syllables, prefixes, suffixes, verb tenses, part of speech, acronyms, abbreviations, antonyms, synonyms, homonyms, and possessives.  With forty cards, you certainly don't have to use them all.  There were a few that I left out as they didn't target the skills I needed to address for this group of friends, but there were still plenty of cards left.

  • Poetry Center

It wasn't until I just wrote this that I realized the word works center and this poetry center are both created by SunnyDays.  I must really like her stuff!  While this is a  poetry center, I see it as more of a fluency center.  This pack comes with fifteen cards that ask the reader to read a poem to themselves, then whisper read it with fluency and expression, and finally complete a skills task.  The tasks focus them on practice with nouns, verbs, adjectives, suffixes, prefixes, compounds, L blends, R blends, digraphs, rhymes, contractions, past tense verbs, handwriting, response to poetry, and imagery. 

My focus with these cards is less on the skills and more on the "with fluency and expression" part.  I wanted my summer school friends to practice fluency.  To do this, I found a bunch of poems that contained a lot of sight words they should know and were not difficult to read.  I copied about 15 different poems and put a few copies of each in a folder.  To work on this center, all a friend needs is a copy of the poem and a task card.  

The only other thing I felt it necessary to do was some explicit instruction on fluency.  The blog Sandra's Savvy Teaching Tips has four fluency posters that were perfect for a mini-lesson on what it means to "read with fluency and expression."  I used her posters and a picture book to do a mini-lesson on our first day before I explained the centers.  The posters were perfect because they were very simple and understandable to my friends.  The best part is that you can DOWNLOAD THEM FOR FREE on Sandra's blog.


In all, I think it cost me about $11 for all three centers.  While it has only been three days, I can say the centers have all been working well so far.  This is good to see as I am planning to use these same centers with my students this coming school year.  Win! Win!


Saturday, April 27, 2013

The Most Important Conversation: Teaching the Use of Dialog in Writing

One of the things I miss most this school year has been teaching writing.  My day is spent in either guided reading groups or small supplemental groups for math and reading.  Rarely, do I get to focus with students on their writing skills. I am surprised at how much I miss teaching it.  

However, I was talking to one of my colleagues the other day regarding some trouble she was having getting her students to include dialog in their writing.  After talking about it for a bit, I was able to offer an idea that has worked really well for me in the past.  I thought I would share it with you.

The problems with dialog in student writing can be many:

  • It's fluff.  They simply write dialog that does not contribute to the piece in any real way.
  • It's overused.  There is dialog everywhere!  Sections that could/should be narrative are turned into dialog. Or, everyone is talking all the time!
  • It's underused..  They can reach an important point in the story where dialog would enhance the mood, convey emotion, build background, or provide information to the reader in an interesting way but they don't include it.  Yet, there might be really ineffective use of dialog at another point in the story.
  • It's not used at all.  I have often read stories with the most interesting characters and shocking events and yet never a word is uttered.
One way to help a student to effectively incorporating dialog is to focus them on what I call "The Most Important Conversation."  I sit with a friend and ask him/her, "If two characters could only speak to each other once in this story, what is the most important thing they would talk about?  What is a conversation they would just have to have with each other? What is it they simply must talk about?"

This important conversation will usually happen at a story point that either takes place in the beginning (to set up the story or build background for the story), at the climax (discussion of that amazing thing that just happened), or at the very end (where they wrap it up.)  If your friend is having trouble identifying where to place the conversation, point out a part in the story where something interesting happens and ask what the main characters would say to each other about it.  Sometimes I have even resorted to role playing where we both pretend to be a character and talk to each other about the story event.

I should mention that prior to this, I have found it helpful to first give my friends a mini lesson on why and when we include dialog. Sit down with your class and make an anchor chart that lists the ways dialog can enhance a story, such as set a mood, advance the plot, provide background to the story, show a character's feelings, etc.   Then, read them some examples from books they know.  I promise they will get it!

After some more discussion to flesh out who will have the conversation, when in the story it happens, and what it will be about, I give my friends one of the sheets below. There are two depending on the writer's ability.  Some will stick to basic dialog while others will write more involved dialog and need more space.   I usually copy the same sheet two sided so they aren't too limited on the length of the conversation.  I then send them off to write this conversation.  Having an organizer like the one below has been very helpful to my friends.  It helps them with the flow of the conversation between the characters.


Once they have the conversation written, we incorporate it into the story.  Now, depending on how much your friends know about dialog you may or may not have to go in and work on tags.  Great time for a lesson on not overusing said and using dialog tags to convey character's feelings.

Essentially, by focusing on the most important conversation, you are teaching your friends that dialog has purpose and can be a powerful tool for a writer.  It's not just put in a writing piece because the teacher says you should or we know it will get us a better score on a state test! Focusing on the most important lesson address all those problems I bulleted at the beginning.  It takes the fluff dialog out of the piece, limits the overuse or under-use of dialog to that one important conversation, and for those that never include dialog at all, it's a first step.

I've included a link HERE WHERE YOU CAN DOWNLOAD AND PRINT THE DIALOG SHEETS SHOWN ABOVE.  Of course, you don't need the sheets to do this.  I just find having the two types of speech bubbles helps to keep my friends visually organized on the flow of the conversation.  

By the way, I included a credit page on the download.  But, just in case you were wondering, the speech bubbles are by by Dancing Crayon Designs  (www.DancingCrayon.com) and the chevron background is from  Designed by Coffee, Kids and Compulsive Lists (http://coffeekidsandcompulsivelists.blogspot.com.au/)  
~~~~~~~~~~~~~~~~~~~~~~~~~~~

On another note,
 I have this little list I keep of experiences that remind me
 "You know you're a teacher when. . . "  
Here's one!


Monday, November 19, 2012

Finally! I'm Back!

It is so good to be back to blogging! Thanks to everyone who was so patient while I was away. I feel like there is some normalcy back in my life, finally! Today's post is about how I'm doing some math workshop scheduling in one of my classes.  At the end, there is also a link to my PDF which you can print up for your own.


But, before I get back to the school blog stuff, I have two last thoughts (and pictures) to share on Hurricane Sandy here in New Jersey.

First thought: I never thought I would routinely see this truck in my community.  We've never had a natural disaster of this magnitude here in NJ.  To have a hurricane come through and cause so much devestation that Red Cross Disaster Relief trucks take residence for a long while is still just astounding to me.
 
Second Thought:  Not really a thought for this one, but a picture to share.  This is the waterfront by my home.  It was completely underwater for much of the storm.  As you can see from the picture, many of the businesses and homes were just destroyed.  However, look closely at the background of the picture.  See those white buildings all the way in the back?  That's New York City.  When I took this picture, I was amazed at how sparkly white all the building were on this day.  It was a cloudy, overcast day.  You can't tell from the picture, but in the middle of all those clouds there was this big beam of sunshine just sparkling down on the city making it shine.  It was just really pretty and nice to see amidst all the damage.
 
 Okay, now on to our regular blogging!
 
In one of the classes I visit for basic skills math instruction, we've begun using a math workshop approach.  We, the classroom teacher and I, quickly realized that we needed to find a way to meet the needs of all the students in a more effective way.  It's a true heterogeneous class.  The span of abilities is tremendous.  Teaching a whole lesson to the whole class just wasn't going to work.  We needed to do more small group direct instruction and practice.  We needed to find a way to let those who needed more guidance get it and enrich and challenge those that were ready to move on.
 
The answer for us was a math workshop approach.  I researched a lot of different approaches and this is the one that seemed to best meet out needs.  In the interest of giving credit where credit is absolutely due, I really adapted what we are doing from Beth Newingham's post on how she runs math workshop.  Beth was a Scholastic Top Teacher.  Scholastic or not, she's definetly a top teacher!  Her post on math workshop was a tremendous help. So much of what she was doing is what we needed to be doing.  When you have a chance, click on the link and check out what she has to say. She will explain it so much better than I can below!
 
Here's the schedule we use.  The picture is a little dark, sorry about that!
I should probably explain that due to scheduling, groups A and B run simultaneously.  Unfortunately, I am only in the room for part of the period, so the teacher and I each meet with a group (A & B) during round 1, then I leave.  The classroom teacher then meets with one group during rounds 2 and 3.
 
Before I go on, here are some other points you may need to know to better understand.
  • Groups A & B are the students most in need of help.  Group C is the middle group and Group D are the high achievers.  Having said that, the groups change depending on the skills being taught.  We do our best to make sure the kids do not have a sense of which is a "high" or "low" group. 
  • "Meet with Teacher" is when students meet with the teacher in a small group to work on skills related to the main lesson.
  • "Seat Work" has students at their seats working on the lesson pages, finishing up work from "Meet with Teacher" and/or differentiated work tasks.  It is essentially the time they apply what they have learned.  In the back of the room, we have four group folders that each contain differentiated work for the week.  My friends just go back and take what they need for the day.
  • "Activity Time" is usually some math game that provides practice with the skills from the day's lesson or the chapter.
So, here' s how we do it. 
 
The class begins with about 10 minutes of whole group instruction that covers the "meat" of the lesson.  It's is explained and then a couple of practice problems are done.  Then, it's time to break-up into groups for three rounds of work.  The first two rounds are about 20 minutes each with the last round about 15 minutes. 
 
Round 1:  Meet with Teacher - This is where our two lowest groups (A & B) meet with the teacher for more explicit instruction and do the lesson work.  With two of us in the room, these groups are nice and small.  Group C begins with "Activity Time" so that they may play with the concepts before coming to meet with the teacher and then do the "Seat Work" where they will apply what they know. Group D begins with the seat work. 
 
At this point, my time in this class is up and the homeroom teacher completes the day's lesson as follows. And, I should mention that she is awesome at it!  I'm lucky to work with a great teacher who really strives to do what is best for her students.
 
Round 2:  Groups A & B now go on to Seat Work.  Group C now meets with the teacher while Group D goes to Activity Time.
 
Round 3:  Group C will now go on to do their Seat Work while Group D now meets with the teacher.  This allows her to go over the seat work with them and trouble shoot any problems.  As they are a high ability group, things usually go smoothly.  This allows the teacher to go on to work on higher level problems using the same skills.  Groups A
 
Have I lost you yet? :-)  Just refer back to the picture of our schedule!
 
After the three rounds, the class meets again for about 20 minutes to review homework and wrap up the lesson.  We still run into kinks now and then, but over all it's working for us.  I am sure there is a better way to do it out there somewhere, and I don't claim our way is the best way, but as I wrote this is working for us.
 
If you've read this long, you deserve a little something!  Below, is the link that will take you to a printable version of the Math Workshop Schedule Board.  It is a PDF and has a few extra sections so you can play around with organizing it.  You also don't have to use them for a math workshop.  Those "Meet with Teacher" would be great to put a magnet on and use on the white board.  You could just write under it who you want to meet with for things like conferencing. 
 
 
So, that's our math workshop routine.  There are three things I love about it.  First, we are seeing good results with more small group instruction.  Second, the kids love it.  Third, the period really flies by with this type of schedule!
 
Thanks again to all of you that hung in there while I was out.  While I do this blog mainly for me (to keep track of what I'm doing and ideas I have) it's always nice to have readers.  So, with Thanksgiving quickly approaching, I can say in all honesty I am thankful for you!  And, no!  I never got around to changing my blog over.  Maybe over Christmas! :-)