Showing posts with label Small Group Instruction. Show all posts

Sunday, January 19, 2014

Reading Tables: Horseshoe or Kidney?

Perhaps, you might remember a while back my excitement about getting a new guided reading table.  I wrote about it here and here.  I was delighted to get my new guided reading table.  It was bight yellow and kidney shaped.  It was close to perfect!  The only thing I wasn't loving was the color.  I started out loving the bright yellow, but as it turns out it shows every little pencil mark, finger print, and even ink from paper. But all in all, I did love it.


Then, I taught summer school.

While teaching summer school, I had the opportunity to work at a horseshoe table.  It seems my love for the kidney table was sorely misplaced!  As it turns out, my true love is the horseshoe table! So much so, that I set out on a quest to get myself one.

Okay, obviously I'm being a little silly about it all with you, but I really did decide that the horseshoe table was a much better option for me. I approached my admin about getting a new table totally expecting to be told to forget it.  After all, it wasn't that long ago that I received the yellow, kidney table.  Instead, I was told if I could find another teacher in need of a guided reading table, I could order the horseshoe and pass on my kidney table when it came.  I was all over that offer! Thankfully, I found a teacher in need, and we were able to swap.  Here's my new table.


Notice it isn't yellow!  I learned that lesson.  Instead, I chose a bright blue that would hide marks.  
So, why the switch?  It wasn't for the color, but for the shape.  I found the horseshoe to be much more conducive to my guided reading groups than the kidney shape.  Here's a picture of the two tables from above.


Using both, here's what I found, the good and the bad of each:
  • The kidney table is very wide at the center.  I found that the child sitting across from me was just too far away.  Now, I should mention that I'm short and that just made the span seem even larger.  I often had difficulty seeing what the child was writing without actually standing up and looming over.  In the horseshoe, every child was close to me.  I could unobtrusively monitor and/or assess all the students' work with no problem. 
  • The width of the kidney table definitely makes it better for demonstrating something or showing a book.  There is room to lay it out in front of the teacher while still giving the students room for their materials.  With the horseshoe, I find that I hold demo things up if I want everyone to see them.  There is enough room to have a book or papers in front of you, it's not that small.  But, it definitely doesn't give the teacher as much room as the kidney table does.  
  • In line with the last bullet point, I do still have plenty of room for materials at the horseshoe table.  Generally, I can fit more kids at the horseshoe than the kidney table.  I usually meet with five friends at the table.  At the kidney, that was the whole table.  With the horseshoe, we still have room.  In fact, the last seat to my right is never used.  That allows me to organize materials I need on that portion of the table. I used to have my table in an area where I had shelves behind me for materials, but when I had to reorganize my room in November for the new reading program, my guided reading table is now sort of free floating.  So, having that extra space at the end of the table works for me.
  • If I have student working on completely different things, it works better at the horseshoe.  I can have a student complete missed work or finish an assignment in the seat over to my far left while I work with three other friends on the other side of the table.  At the kidney table, there wasn't enough space for that kind of separation.
  • A minor con of the horseshoe is that the U shape where the teacher sits is deep and can put you in the way.  If I am working with a full table of students and want them to have a real conversation about something we are working on, I have to be sure to pull my chair back so that the child seated at the ends can see each other.
There are actually so many different shaped tables you can choose from.


A lot depends on the age of the children.  I know our lower elementary teachers generally have horseshoe tables and some flower tables, while our upper elementary teachers generally use kidney shaped tables. You also need to take into account how it works for the teacher.  For me, the kidney table just wasn't a favorite.  All of our classrooms also have an extra rectangular or trapezoid table in them. When I push-in to other classrooms for guided reading, those are the tables I generally use. However, when I am working in my classroom, I am happy to have my horseshoe table to work at!

Do you have a type of table you prefer?

* * * * * * * * * * * * * * * * * * * * * * * * * * * * * * * * * * * * * * * 
By the way, I am well aware that I posted on January 1st about posting more regularly and them promptly disappeared for 19 days.  I actually have posts ready to go but totally forgot to schedule their posting.  Blogging fail!  Sorry about that. The good news is that there are posts already written and ready to be published. 


Tuesday, March 19, 2013

Personalized Sticky Notes for Reading

I've been working with my small group friends on comprehension skills.  I know, who hasn't been doing that! :-)  One of the areas they needed a great deal of help with was monitoring their thinking as they read.  They would often just read through without any real understanding of what was happening in the text.  Or, they read on thinking they get it, yet when we discuss their reading they have significant misconceptions or have totally missed the important points of the text.  They simply did not self-monitor as they read. 

To help with this in their independent reading, we have been working on Stop! Think! Jot!  It is literally what it says.  Stop after reading a certain amount.  Think about what you are reading.  Do I understand what is going on?  Jot down a thought about it.

To begin, we worked on Stop! Think! Jot! as a tool to "check-in" with our mind to make sure we understand the text.  The "think" prompt was simply; Do I understand what is going on in this part?  Can I retell it in one or two sentences?  Those one or two sentences would be the Jot! part.  To help with this, I placed sticky notes in strategic spots in their independent reading books.  When they hit a sticky note, they had to jot down that one or two sentence retelling.  Having to put it in writing really stopped many of my friends in their tracks at first.  I would see them start to write, stop, put their pencil down, and go back to reread.  This shows me that they really didn't have full comprehension of their reading the first time. Most of my friends have improved tremendously with monitoring their understanding of the text.  Most now do it without the prompting of a sticky note.

We then moved on to making connections, asking questions, making predictions, or just noting our thoughts about the book, interesting words, etc.  In guided reading, I select the sections we read and where we stop to think and discuss.  However, when my friends are doing independent reading, they still need some guidance on when it is time to stop and think.  Even at this point in the school year. (insert sigh here) They are getting better, but  I still have a select few who will read through the text without ever stopping to think about the text.  I know that they are mentally stopping to "check-in" and make sure they understand, but then they just keep going.

Much like I did in the beginning of the year when we worked on monitoring comprehension, I strategically placed sticky notes in their independent reading books reminding them to jot down a thought.  I ended up writing a lot of sticky note reminders!  Now, I know there are tutorial and templates on how to print on sticky notes.  That link will take you to a great post on the blog Ladybug's Teacher Files that shows you just how to do it and includes templates.  I think that's great, but I have this fear of jamming my printer.  And honestly, I just don't want to print my own sticky notes. If you want to, great!  It just wasn't for me,  I needed a better way.

I ordered these personalized sticky notes from Vistaprint.  Vistaprint allows you to personalize just about anything for very reasonable prices.  The pic is a little fuzzy because I took it off a screen shot of my order form.
I created a sticky note that reminds my friends of exactly what they need to do and provides a spot to write the page number.  This is great for when we "write long" from a sticky.  I ordered ten pads of 50 notes each for $22.49.  Not a bad price for 500 personalized sticky notes.  They should last me a while as I only need them for a select few friends, don't overload their books with them, and use the printed notes to graduate them into doing it using their own blank sticky notes when they find a "sticky worthy" spot in their book.

This might be a good time to point out that while I do place these sticky notes in their books, it's important to just do a few.  My main goal is that they read with understanding.  If I overload their book with sticky notes it becomes more of a writing assignment.  It also steals some of the joy of reading. 

When I worked with my enrichment students, they would actually Stop! Think! Jot! to death.  I have  had some of my lower ability students do this as well.  Their books would look like a peacock in full plumage with sticky notes bursting out.  For them, one of the big lessons I would always do revolved around the idea that when everything is important, nothing is important. However, some of my friends this year still need the prompting that sticky notes placed by the teacher provides.

I love that Vistaprint allows you to personalize so many different things.  In the past, I have ordered thank you cards for my classroom, punch cards for rewards, and more.  In fact, with my sticky note order I also got something fun and motivating for my friends that I will share in another post.  By the way, Vistaprint is in no way sponsoring this post. They don't even know I exist other than to bill me and send me the goodies I order! :-)

Monday, August 6, 2012

Interactive Small Group Anchor Charts

It may not be a very exciting title, but I am very excited with what I've created and even more excited to share with you!  In September, I will be working with small groups in other teachers' classrooms.  It got me thinking about how different each room will be.  Will they have up the anchor charts I might need?  What if I want to refer to a specific anchor chart that may not be up in the classroom, but is needed for my small group?  I needed some way to have anchor charts available to me at any time that were geared specifically to the needs of my basic skills students.  They needed to be portable as I am in different classes throughout the day, yet they needed to be large enough to display for my friends.  On top of all that, I wanted them to be interactive in some way.  Not asking much, huh?!

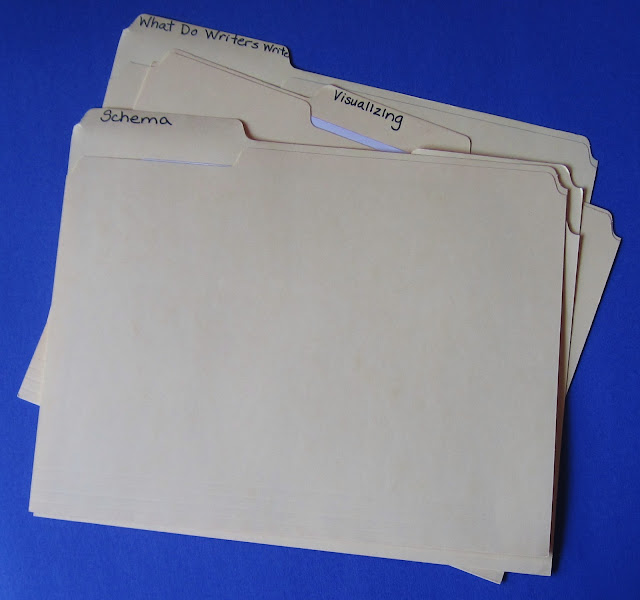
Here is where I came up with interactive small group anchor charts.  I created this with the idea that I would be taking them from class to class, but I think they are perfect to have for homeroom teachers to use with small groups as well.   So, here they are.  Not too exciting at first glance, but just wait.  The magic lies within!

You don't get more portable than a file, so that's were I began.  I started by making one of the anchor charts I use at the beginning of the year.  Open it up, and there it is!  This was totally inspired by The First Grade Parade blog.  She does a much better job with the pencil that I do!
 On the left side of each folder, I put a smaller version of the anchor chart I would normally use on large chart paper in class.  Normally, I like to create anchor charts with my students but I have limited time in each class this year.  So, I'm pre-making (is that even a word?) anchor charts for reading and writing that hit the key points I want to reinforce.

On the right side, I wanted something that would be interactive.  For this chart, I can have my small group brainstorm some ideas about writing topics on sticky notes and put them on the right side.

After making the "What do writer's write?" small group anchor chart, I began to make one for schema.
As I was working with my Crayolas and markers, I realized there was an easier way.  In my anchor chart binder, I had pictures of many of the anchor charts I used last year.  I just printed out the picture of the anchor chart on schema that was in the binder and glued it in the file folder.  HUGE time saver!
I still wanted the interactive aspect, so on the right side I printed out a page that I will use to brainstorm our schema on whatever topic we are working with.  My friends can put their sticky notes right on the page.  Since I'm printing out the pages and gluing them in, I would have preferred to use colored file folders.  I think it would look better, but I have a million manila folders to use up.

So, what if you don't have an anchor chart binder to fall back on?  I don't have anchor charts pictures saved for everything I need, but the web is a wonderful thing!  There are a million charts out there to use.  I found this anchor chart about visualizing on Pinterest and loved it.  It is from the blog Second Grade with Mrs. Wade.
Again, wanting the interactive aspect, I made the picture on the right.  For practice, I'm planning to read my friends a short passage and have them do a quick sketch on a sticky of what they visualized.

All the pictures show the file folders lying flat on the table, but in using them I will STAND THEM UP!  Standing up, it's large enough for everyone seated at a small group table to see and refer to.  It's like having a mini chart stand on the table.  At the end of the lesson, I can just close the folder, stick it back in my bag, and move on to the next class.

What I like about the file folder aspect is that I can still use it as a folder.  If I have any type of hand out or teaching materials I want to use with the lesson, they are easily paper clipped and stored in the folder.  Not only do I have an anchor chart at my fingertips, I have the papers I need as well.  Also, I'm planning to put a piece of card stock in a clear page protector and keep it in the folder.  It's possible I may need to use the same anchor chart with different groups on the same day.  When I am done working with one group, I can just take their sticky notes and put them on the plastic page protector. Then, it's ready to use for the second group. The next day, if I need to use it again, I can just quickly stick them back on.

UPDATE:  (8/8/11) - As I have been working on these, I've debated if I was going to laminate them or not.  Then, I realized it was a no-brainer.  Of course, laminate them!  Up until now, the interactive sections I created have been based on using sticky notes that I could remove.  If the charts are laminated, the interactive part can now be written on with dry or wet erase markers.  Now, the interactive part could have activities that have the kids draw a line from one thing to another, circle the word that . . . , or anything else you wanted to do.  The only drawback using them that way is that if you need to use the chart with another group on the same day, you will lose the work of the original group.  But, that would just be the day you use sticky notes instead.   And, thanks so much for all the positive feedback on this idea!  I love hearing from you!

I should note, that I don't think it is a problem to borrow anchor charts made by others as long as it is for  your classroom use.  I do note on the back of the folder the web site I borrowed the chart from in case I need to share it with another teacher.  I am a believer that we don't need to reinvent the wheel if it's not necessary.  I have no problem with people using the charts I post on my blog.  Feel free to take and tweak or not tweak!  If I do post the work of someone else, I am sure to give credit and link to the amazing authors.
So, what do you think?  
Could this idea work for you?