Showing posts with label classroom setup. Show all posts

Sunday, January 19, 2014

Reading Tables: Horseshoe or Kidney?

Perhaps, you might remember a while back my excitement about getting a new guided reading table.  I wrote about it here and here.  I was delighted to get my new guided reading table.  It was bight yellow and kidney shaped.  It was close to perfect!  The only thing I wasn't loving was the color.  I started out loving the bright yellow, but as it turns out it shows every little pencil mark, finger print, and even ink from paper. But all in all, I did love it.


Then, I taught summer school.

While teaching summer school, I had the opportunity to work at a horseshoe table.  It seems my love for the kidney table was sorely misplaced!  As it turns out, my true love is the horseshoe table! So much so, that I set out on a quest to get myself one.

Okay, obviously I'm being a little silly about it all with you, but I really did decide that the horseshoe table was a much better option for me. I approached my admin about getting a new table totally expecting to be told to forget it.  After all, it wasn't that long ago that I received the yellow, kidney table.  Instead, I was told if I could find another teacher in need of a guided reading table, I could order the horseshoe and pass on my kidney table when it came.  I was all over that offer! Thankfully, I found a teacher in need, and we were able to swap.  Here's my new table.


Notice it isn't yellow!  I learned that lesson.  Instead, I chose a bright blue that would hide marks.  
So, why the switch?  It wasn't for the color, but for the shape.  I found the horseshoe to be much more conducive to my guided reading groups than the kidney shape.  Here's a picture of the two tables from above.


Using both, here's what I found, the good and the bad of each:
  • The kidney table is very wide at the center.  I found that the child sitting across from me was just too far away.  Now, I should mention that I'm short and that just made the span seem even larger.  I often had difficulty seeing what the child was writing without actually standing up and looming over.  In the horseshoe, every child was close to me.  I could unobtrusively monitor and/or assess all the students' work with no problem. 
  • The width of the kidney table definitely makes it better for demonstrating something or showing a book.  There is room to lay it out in front of the teacher while still giving the students room for their materials.  With the horseshoe, I find that I hold demo things up if I want everyone to see them.  There is enough room to have a book or papers in front of you, it's not that small.  But, it definitely doesn't give the teacher as much room as the kidney table does.  
  • In line with the last bullet point, I do still have plenty of room for materials at the horseshoe table.  Generally, I can fit more kids at the horseshoe than the kidney table.  I usually meet with five friends at the table.  At the kidney, that was the whole table.  With the horseshoe, we still have room.  In fact, the last seat to my right is never used.  That allows me to organize materials I need on that portion of the table. I used to have my table in an area where I had shelves behind me for materials, but when I had to reorganize my room in November for the new reading program, my guided reading table is now sort of free floating.  So, having that extra space at the end of the table works for me.
  • If I have student working on completely different things, it works better at the horseshoe.  I can have a student complete missed work or finish an assignment in the seat over to my far left while I work with three other friends on the other side of the table.  At the kidney table, there wasn't enough space for that kind of separation.
  • A minor con of the horseshoe is that the U shape where the teacher sits is deep and can put you in the way.  If I am working with a full table of students and want them to have a real conversation about something we are working on, I have to be sure to pull my chair back so that the child seated at the ends can see each other.
There are actually so many different shaped tables you can choose from.


A lot depends on the age of the children.  I know our lower elementary teachers generally have horseshoe tables and some flower tables, while our upper elementary teachers generally use kidney shaped tables. You also need to take into account how it works for the teacher.  For me, the kidney table just wasn't a favorite.  All of our classrooms also have an extra rectangular or trapezoid table in them. When I push-in to other classrooms for guided reading, those are the tables I generally use. However, when I am working in my classroom, I am happy to have my horseshoe table to work at!

Do you have a type of table you prefer?

* * * * * * * * * * * * * * * * * * * * * * * * * * * * * * * * * * * * * * * 
By the way, I am well aware that I posted on January 1st about posting more regularly and them promptly disappeared for 19 days.  I actually have posts ready to go but totally forgot to schedule their posting.  Blogging fail!  Sorry about that. The good news is that there are posts already written and ready to be published. 


Tuesday, August 27, 2013

READ in the Hall

On Monday, I finally started on my classroom.  It's been a project because 80% of everything I have was in a box.  This year, I am only going to be teaching literacy.  That means two things:

  1. You won't be seeing a lot of math posts this year! 
  2. My entire classroom from decoration, instruction, to function is focused on reading. 
 Every corner of my room relates to reading in some manner.  This includes the area outside my door.  Every year, I like to put something out there that can stay up all year.  I found these "Good Readers" posters and loved the content and color theme.  My room is all bright colors (a little too bright maybe, but I will explain that in a post to come) and these posters fit right in with what I'm teaching, my room colors, and have content all kids need to be reminded of.

 These reading strategies subway art posters are by Hope King.  They were exactly what I was looking for!  If you get them, I would suggest taking them to Staples or Office Max to print.  All that black ink would wreck havoc with your home printer.  I also find that anything I have printed at Staples is much more vibrant than anything my dinky little printer can produce.  After printing, I just laminated them.  Easy peasy!


Once I had the posters, I needed something to pull it together.  I made these READ letters to match the posters.  I think it goes together really well.  The lined letters match the "Good Readers" letters on the posters. I was going to put them up as a download for you, but I realized I used a font that was for personal use only.  If I get a chance, I will try to redo them with a font I can publish for you.


In the past, I have decorated the outside of my room several different ways.  I was able to find the past two years buried in my blog.  That's one of the things I like about blogging. It keeps a great record of things I've done in the past, for better or worse!

In 2011, I had a simple sign that actually fits in with this year's color scheme.

In 2012, I went with some motivational signs.

And for 2013, we READ!

If you look closely in the picture above, you can see just a couple of the many, many boxes I have been unpacking the past two days.  I don't dare show you the inside of my room just yet!  However, in my next post I am going to share a project I found via an Instagram picture that I knew I just had to do for my room.  
Stay tuned!


Saturday, August 25, 2012

A Room For One

My room is ready for . . . me.  

I don't have a homeroom class this year, so I don't have to set-up my room for students.  However, I did.  Sort of.   Last year, I began to think my room was a bit too bright.  I had a lot of different bulletin board colors and borders going on, multi-colored baskets galore, and a bunch of big and bright polka dots on my window.  This year, my plan was to tone it all down a bit.  I wanted to have one color bulletin boards with the same border and some color unity throughout the room.  I was even going to break the bank and buy all new baskets in one color for my class library.  Then, I found out that I was going to be a push-in basic skills teachers.  Since there wouldn't be a class of students living in my room this year, I toned down the plans a bit a lot.  Take a look!


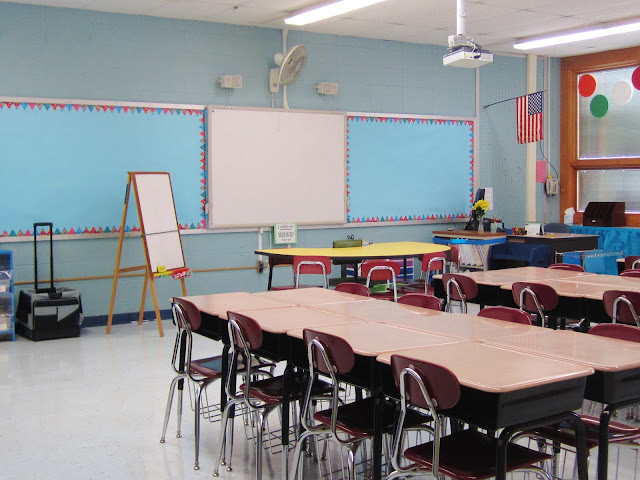
This is the view of the front of my room.  I moved my meeting table up to the front because I think I will probably be pulling some friends to the room for small group instruction sometimes.  Notice all my bulletin boards are sky blue and have the same cute triangle border.  I love it!  It might look a bit boring, but if I had a class in here they would be filled with student work which would provide plenty of interest.


From this view, you can see I went with blue shelf curtains.  Last year, it was lime green!  I went with blue this year for some unity.  It also hides the ugly copy boxes filled with my teacher books that are sitting on the shelves.  In the picture below, you can see that I did keep my colorful dots on the windows.  I think because the rest of the room is toned down a bit, they pop more.  And yes, those are the desks that will sit empty this year. :-(   


But, it's not all pretty blues.  Here's the back of the room with all the empty boxes I didn't need to unpack this year.  I'm not even going to show you the other side of my room with the four empty bookshelves.  It makes me sad to think about all my books packed away in boxes.  :-(


As I'm writing this post, I was asked, "Why would anyone want to see your empty classroom?"  Well, I don't know!  But, I do know I love seeing other teachers' classrooms.  It's kind of like sneaking a peak in someone's house when you walk by at night and the shades are up and the lights are on!  I admit, I totally do that!  Looking at the pictures above, it does seem like a very plain and boring room but I don't really have a need to put up anything right now.

If you click over, you can see my room set-up from last year. Holy cow, the crazy colors!  I loved it at the time, but I'm ready for my calming blues this year.  If you click over and look at the pictures, take note of the book baskets.  When I have my own homeroom again (hopefully next year!) I am definitely going to invest in new baskets in a single color.

On a happy note, remember when I telling you about the rolling cart I ordered for my travels from room to room this year?  Well, it came and I love it.  So many compartments to fill for my organizational OCD!  Or, as the saying goes, my CDO where the letters are in order AS THEY SHOULD BE!!   :-D

Loving those compartments.  This cart will be perfect for holding the papers, books, and supplies I need as I visit my friends throughout the day.  By the way, check out that close-up of the border.  Isn't it cute?  Gets all my crazy colors in without being overwhelming.

So, there you have it.  My room for one! 

A Question For You:  Have you ever looked around your room and decided something needed a major do-over for the next year?  This year for me it was toning down all the bright colors.  What was it for you? 


Thursday, August 23, 2012

Hallway Decorating and Great Printables

Two posts in one day!  
I know!  
Don't fall over!  
I'm just happy with how my last little 
school project came out and wanted to share.

I spent the last two mornings getting my classroom organized for the coming school year.  Since I don't have a homeroom, there wasn't much to do. . . if you are a normal person.  Which it seems I'm not.  Yes, I changed my bulletin boards and totally arranged the classroom for my nonexistent students!  Even thought I really only use the room on my prep periods, I still wanted it to look nice.  Also, it seems likely that I will be pulling some friends to the room for small group instruction.   I'll show you my new classroom set-up in another post.

Today, I want to share with a great web site that inspired me to use her printables to decorate the outside of my classroom.  Are you familiar with the web site technology rocks. seriously.?  I found the site through Pinterest.  This blog, written by a teacher, has AMAZING printable posters that are perfect for the classroom.   The link above will take you to her printable page of school themed signs.

Using her amazing posters and some sparkly border, this is now the outside of my classroom.

You know I have the gnarly orange lockers outside my room.  They always challenge me to find vertical displays.  I knew I wanted the posters up, but I wanted to connect them in some way.


I got some sparkly border paper and taped two pieces together from the back.  It gave me a nice wide design with cute wavy edges.  I put those on the lockers and wall.  I then printed out color copies of her posters on white copy paper.  Using a glue stick, I attached them to some bright yellow construction paper and laminated them all.


The last step was to stick the posters on top of the border to the wall and lockers.  Easy peasy!  I put two on each locker and three on the wall.  Here's are some up close.

As I noted, all the posters (except for one) are from the blog technology rocks. seriously. I used a couple of them in my room last year, but this year I used a bunch more. And, I didn't even print out all she has.  THIS LINK will take you to her printable page where you will find links for school signs, holiday signs, faith signs, and sonic signs.  Seems she has a thing for Sonic!  All her signs are wonderful!  And, they helped make the space outside my classroom a spot people stop, read, and think!

Don't forget to scroll down and read the professional goals and a winner post I published earlier today.  It really gives you some food for thought as to what is a priority to work on this year.  
And, if you are the big winner Silvia, don't forget to email me your mailing info!

Friday, June 22, 2012

My New Summer Digs!

Summer school starts Monday!  For various reasons, I wasn't able to go in and set-up my room until today.  I will be teaching in one of the other elementary schools in my district.  One that has AIR CONDITIONING!!!  I'm a bit happy about that!

The room I am in is a third grade classroom, but everything in it has been packed up by the teacher.  That means I had to box up supplies from my classroom to bring over.  It's a good thing I threw everything and then some in my boxes because I found out the summer school supplies they ordered were not going to be delivered in time.  So, here's a look at my temporary digs:

It is so strange to be in a classroom that isn't yours.  When I came in the desks were all in the middle of the room with chairs scattered.  I had to rearrange.  I also had to do some decorating to make the room somewhat inviting.  I had some leftover circles from my classroom, so I put each friend's name in one with some encouraging words on the white circles.  I can't put up too much, but as the weeks go on I know there will be anchor charts and student work up.
I set up two tables of four and off to the side of the room, you can see the meeting table.  I have eight friends who are at three different reading levels.  It makes for three tiny groups!
This is the supply table I set up.  I had to find something to do with all those extra desks!  On my way in, I stopped at the dollar store to grab a couple of plastic tablecloths.  The yellow isn't very bright in these pictures, but in person it's much brighter and perks up the room nicely.
On the other side of the room, I hid some more desks and spread out some center activities.
In the front of the room, the teacher has this nice carpet for shared reading.  I notice that my 5th graders do not really like coming to the carpet.  They would often much rather stay at their seats.  Does anyone else notice this with their older friends?
Finally, in the back of the room, I set up a couple of table/desk meeting areas.  Sometimes you just need to spread out a bit.  Also, some friends tend to work better when they can sit away from others!  I wanted to have options for them and me. ;-   In the left corner, you can see that there is another carpeted area.  I think that will be used in independent reading more than anything else.

So, that's where I will be spending the next five weeks.  Tomorrow, I need to work on some lesson plans.  The work never ends!!!!!!

Saturday, June 16, 2012

Death of a Classroom

Okay, I will admit my post title is overly dramatic, but it fits my mood these days.  As you might now, I posted about being moved from my classroom into a basic skills position.  This move means I will be pushing into several other teachers' classrooms to work with specific children during their literacy period.  It means no homeroom for me. There's no classroom to set up, a wonky schedule, and much more.  I really, really tried to see the positive in this move.  And, there are positives to it.

However, this week I had to pack up my classroom.  I was told to pack it up as if I were moving.  That means everything gets packed up, and that is how it shall stay. And, that is when it really hit me.  As I packed my room into box after box, I was surprised at how sad I became.  What was once a thriving classroom, a place I worked hard to make welcoming to my friends, a place where learning happened, where silly moments were enjoyed. . . well, it became this.

Books on shelves that will not be dusted off and passed out in September.

An amazing class library that is now in boxes where it will stay next year.

Empty desks that won't be used by new friends, filled with books, or need name tags.

Book crates that held the books my friends chose to read all year, now disassembled and boxed.

An empty meeting table that will not hold any meetings next year.

I think really hit me as I was packing up because every time I would pack something away, I would think about what project I would do with it or how it was used in my classroom.  Then, I started to realize that wouldn't be happening next year.  Also, there were moments where I suddenly realized things like I wouldn't be placing any Scholastic book orders anymore.  No more points to buy books.  :-(

So, if there hasn't been a lot of posting these past couple of weeks, it's because I just couldn't find much to say.  I've been in a funk. I've allowed myself to wallow in my sadness.   However, I am not a "live in the funk" kind of person.  I do know there will be positives in this move.  So, now that the room is packed up and summer has officially started (Friday was my last day!)  it is time to move on. 

I start summer school in a week.  It's only four days a week, three hours a day, for five weeks.  I will be working with some challenging kids who don't want to be there.  So, I have challenged myself to make this a FUN learning experience for them.  I have a lot of freedom within the curriculum, so it will give me lots of opportunity to be creative.  I will be sure to post about what we are up to this summer.

After summer school, I've decided to take a fun vacation at the end of August. I've never been able to take a vacation at the end of August since I've always gone in to school that last week or so to set up my room.  Since I don't have to do that this year, I am going to take advantage of the time.   I'm not sure where I want to go yet, but I want it to be FUN!!  Living by the Jersey shore, I'm at the beach all the time so I'm not looking for an island-beachy vacation.  I want to do something different, but still stay within the US. 
Any suggestions? 

I'm not exactly sure what the next school year will bring, but for now. . .


Saturday, January 28, 2012

My Room and a Mish-Mosh of Stuff!

Well, I'm finally posting some pictures of some of the changes I made in my room.  Here is how I set up my library.  It's actually been in this configuration before.  When I found out I was getting a new leveled library, I had to make room.  It turns out that going back to this set-up worked best.
That arrow and caption point out where I'm planning to put the new books.  I typed it in the picture, but it came out really tiny for some reason.  My library is arranged by theme, but I'm excited to add a leveled library.

The yellow shelf runs across the front of my room.  On the other side of my Pro Board is my math area.
I like my math area because it is organized and the vocabulary is posted up front and center.  My friends tend to incorporate the vocab in our math discussions more when they are visible.  That big blue cart is one of the two new shelving units I got.  It holds more math manipulative, but I turned it around because it is sort of messy looking.  Plus, I thought I could put a poster or two on the back blue side.  They were originally going to be bookshelves, but they turned out to be too deep for books.


Below is my new meeting table, otherwise called Big Bird by my friends.  Yeah, even they noticed it is really yellow!
I do love it, but I find it shows every pencil mark and grubby hand print.  I probably should have gone with a darker color.  The area behind the meeting table is a work in progress.  I'm still working on organizing my literacy materials in this area.

Finally, I'm showing you this area for one reason only.  Notice the arrow and bubbles I drew in.
See the bubbles on my whiteboard?  I had my VOICES board there before, but I moved it.  When I took the board down all the tape residue stayed behind.  It was fine for a while.  I knew it was there, but you really couldn't see it.  I also don't use the board for writing, so it wasn't a problem.  Then, I was out for a workshop.  A substitute wrote on the board and then erased.  Of course, it stuck to all the tape residue.  I've been trying to figure out a way to remove it without ruining the board.  The arrow points to a bottle of PAM nonstick cooking spray.  Someone told me that it will take off the tape residue without ruining the board.  I'll let you know if it works.  However, if you have any tips on how to clean this mess please share!!

So, here's an overview of the front of my room from the door. The meeting table is in the back.

One of the things I am going to do next year is tone down all the color.  I think it is all a little busy.  Have you ever noticed the difference between the classrooms of male and female teachers?  There are two male teachers down the hall from me and their rooms make mine look like I'm preparing for a carnival.  They have very spare rooms.  Not a lot of color, not a lot of fancy borders or posters.  Is this true in your school?  Next year, I'm going to find a happy medium between what I have going on and what they don't have going on!

Now, here comes the mish-mosh of stuff.

See these beautiful roses?  One of my students brought them in for me for the Chinese New Year!  Aren't they gorgeous?  I'm really not big on cut flowers, but these made me smile all week.  I hadn't really planned to do anything about the New Year, but I knew I had to. We watched a quick documentary on Discovery Education's United Streaming about the Chinese New Year.

I went to Staples Office Supply today and bought these.
Do you remember Paper Mate's Flair Markers?  I have love these since I was a kid.  It rivals my love of Mr. Sketch Scented Markers!  I'm hoping these will motivate me to attack the pile of papers I have to grade this weekend.  It's good to have hope, right?! ;-)

I also bought four of these Swingline Staplers.  They come in different colors, so I got red, purple, blue, and green.  Added bonus is that they were on sale for only $5 each and I had a 15% off coupon.
For some reason, my friends have destroyed every stapler I had this year.  And, I'm talking heavy duty staplers.  Why do they feel it necessary to make a fist and pound the stapler with all their might?  We are going to have yet another lesson on how to staple correctly when I break these out on Monday.

Finally, I found this anchor chart on Pinterest and had to share.
It is from the blog The Adventures of a 6th Grade Teacher.  It totally reminds me that I have been slacking on teaching Latin roots.  I love the chart and may just have to borrow it.  The blog is by a first year language arts teacher named Miss Klohn.  Judging from her blog, she is doing a phenomenal job for a first year.  I even noticed she is using the thinking stems I use.  :-)

I have another post on some professional reading for tomorrow or Monday.  Depends on how the rest of the weekend goes.  If you do guided reading groups, check back.  However, the book I'm going to share is great for anyone who teachers reading, guided or not.

Enjoy your day!

Wednesday, January 25, 2012

A Bit of a FACElift!

Well, I thought I was closer to finishing my room than it turns out I really am!   Did you ever look at pictures taken in your home and start to notice all these different things that you don't notice in real life?  That's what happened as I took some pictures of my classroom for my "after" blog post.  I started to notice all these little things that I still need to take care of, so the after blog post is on hold for a bit.   The whole room reveal will be coming soon.  Gee, that makes it sound much more exciting than it really will be!

But!  In the meantime, I am going to share a picture of the new spot I put my FACE board.  I first showed you my FACE board in this post.  It's the board where I post a quick summary or reminder for my friends of the mini lesson we completed.  I still get a lot of questions about this board from blog land and even a few teachers in my own building.  Because of that, I thought I would share how it has evolved since the beginning of the year.  Here it is in its new spot:
In the process of moving the room around, the FACES board ended up on a closet next to my meeting table.   Oh, here's a sneak peak of that table for you.  The meeting table that I was worried was going to be way too yellow?  Yeah, it's really yellow!

But, I love it!  Now, back to FACES.  I still use the board in much the same way I noted in that earlier post.  After a mini lesson, we put up a one or two sentence summary of what we learned.  The board is now, as before, next to my meeting table and it comes in handy.  I often have my friends refer to it when we are working in our guided reading groups.  Here are some of the different cards we've put up so far:

FLUENCY

ACCURACY

COMPREHENSION
EXPAND VOCABULARY
-Voracious reading got cut off!
I think you can see some of our nonfiction lessons making their way on to the board.  I do still wonder about it sometimes.  I know that from a distance, the cards are hard to read.  If you look at the first picture above, you can see what I mean.  I wonder if I should maybe print up the cards in a bold font to make it easier to see.  On the other hand, I mostly use the board with my friends at our meeting table where it is all perfectly easy to read.  For this year, I've decided it is what it is.  I just don't have the time to put in to redo all the cards.  It's something to think about for next year.

Do you have a FACEs board?  How do you use yours?  If you don't, any ideas on how to improve on mine?  I'm always open to suggestions!

On a totally different topic. . .  If you blog, how do you come up with blog titles?  Sometimes I try to jazz it up, as in "A Bit of a FACElift." but most of the time I just post the topic of the blog as its title.  Hence the exciting title of my last post, "Nonfiction Text Structure."  So, is it a downer when blog titles are basic and boring?