Showing posts with label Reading Workshop. Show all posts

Monday, January 20, 2014

Prefixes! Roots! Suffixes! Oh My!

Guess what we've been studying? 
Pretty much what it seems everyone else has been studying! 

 
As I finished my Greek Mythology unit with my 4th grade enrichment friends, we closed by studying Greek word parts. The picture above shows the standards we met and a quick view of the big letters.  Take a look at the finished display below, and I'll explain just what we did.  Ignore my pocketbook and mess on the table!

After finishing reading various myths and completing projects related to them, we went on to finish the unit with a study of Greek roots.  I found a great resource for this on Teacher Pay Teachers.  It is a unit of Greek roots that comes with illustrated examples.  Below are just some of the cards that come with the unit.  My friends got the biggest thrill when they connected the fact that in the myth The 12 Labors of Heracles the water serpent he killed was named Hydra which related to the root hydr/hydra and means water.  It all sort of clicked like magic for them.  There's a lot that comes with this resource including the making of a tiny box which holds a tiny version of all the cards.  Each of my friends had their own box of cards and we wrote additional words we could brainstorm on the back of each card.

Once we had studied most of the cards included in the unit, we went on to look at more common prefixes, roots, and suffixes that fourth graders will run into that may or may not be of Greek etymology.  I created a packet which listed some of each, their meaning, a couple of examples, and a column for my friends to work with a partner to brainstorm more words they knew which fit.
 
I had drawn some of them freehand (which is why some of them look a little wonky!) on white oak tag and spread them out on the floor.  After we had reviewed and discussed our packets, the kids were given a Sharpie and a highlighter.  They wrote their words on the corresponding poster, underlining the prefix/root/suffix.  We then hung them in the room.


I got the inspiration for the big letters from a Pinterest picture posted by the blogger of Smitten with First.  She was doing a lesson on suffixes and made some big letters of the most common ones. 
When I saw her picture, I knew it would work perfectly with my friends.  Some lessons just span the grade levels!

This lesson turned out to be a lot of fun for us all.  Having the display in my room has encouraged all the kids to constantly try and think of new words that could be added.  I told them we would create a chart to add the words to.  There is not way I am climbing on top of those shelves again!  :-)  While I did the is lesson with enrichment students, it is very much a great way to teach word parts to children of all grades and ability levels. 

~8~8~8~8~8~8~8~8~8~8~8~8~8~8~8~8~8~8~8~8~8~8~8~8~

On a different note, Happy Martin Luther King Jr. Day! 
It is a day to remember a great man and the courage and grace he showed in the face of intolerance and discrimination.  Last year, my friends and I had school on this day in order to make up days lost to Hurricane Sandy.  It prompted me to write a post on some of the activities I was planning to do in remembrance.  This year, like many of you, we are off today.  I know it is a little late, but if you are looking for something to do tomorrow, you can click HERE to see the post I wrote.  It includes several links to videos, activities, and lessons.

Sunday, January 19, 2014

Reading Tables: Horseshoe or Kidney?

Perhaps, you might remember a while back my excitement about getting a new guided reading table.  I wrote about it here and here.  I was delighted to get my new guided reading table.  It was bight yellow and kidney shaped.  It was close to perfect!  The only thing I wasn't loving was the color.  I started out loving the bright yellow, but as it turns out it shows every little pencil mark, finger print, and even ink from paper. But all in all, I did love it.


Then, I taught summer school.

While teaching summer school, I had the opportunity to work at a horseshoe table.  It seems my love for the kidney table was sorely misplaced!  As it turns out, my true love is the horseshoe table! So much so, that I set out on a quest to get myself one.

Okay, obviously I'm being a little silly about it all with you, but I really did decide that the horseshoe table was a much better option for me. I approached my admin about getting a new table totally expecting to be told to forget it.  After all, it wasn't that long ago that I received the yellow, kidney table.  Instead, I was told if I could find another teacher in need of a guided reading table, I could order the horseshoe and pass on my kidney table when it came.  I was all over that offer! Thankfully, I found a teacher in need, and we were able to swap.  Here's my new table.


Notice it isn't yellow!  I learned that lesson.  Instead, I chose a bright blue that would hide marks.  
So, why the switch?  It wasn't for the color, but for the shape.  I found the horseshoe to be much more conducive to my guided reading groups than the kidney shape.  Here's a picture of the two tables from above.


Using both, here's what I found, the good and the bad of each:
  • The kidney table is very wide at the center.  I found that the child sitting across from me was just too far away.  Now, I should mention that I'm short and that just made the span seem even larger.  I often had difficulty seeing what the child was writing without actually standing up and looming over.  In the horseshoe, every child was close to me.  I could unobtrusively monitor and/or assess all the students' work with no problem. 
  • The width of the kidney table definitely makes it better for demonstrating something or showing a book.  There is room to lay it out in front of the teacher while still giving the students room for their materials.  With the horseshoe, I find that I hold demo things up if I want everyone to see them.  There is enough room to have a book or papers in front of you, it's not that small.  But, it definitely doesn't give the teacher as much room as the kidney table does.  
  • In line with the last bullet point, I do still have plenty of room for materials at the horseshoe table.  Generally, I can fit more kids at the horseshoe than the kidney table.  I usually meet with five friends at the table.  At the kidney, that was the whole table.  With the horseshoe, we still have room.  In fact, the last seat to my right is never used.  That allows me to organize materials I need on that portion of the table. I used to have my table in an area where I had shelves behind me for materials, but when I had to reorganize my room in November for the new reading program, my guided reading table is now sort of free floating.  So, having that extra space at the end of the table works for me.
  • If I have student working on completely different things, it works better at the horseshoe.  I can have a student complete missed work or finish an assignment in the seat over to my far left while I work with three other friends on the other side of the table.  At the kidney table, there wasn't enough space for that kind of separation.
  • A minor con of the horseshoe is that the U shape where the teacher sits is deep and can put you in the way.  If I am working with a full table of students and want them to have a real conversation about something we are working on, I have to be sure to pull my chair back so that the child seated at the ends can see each other.
There are actually so many different shaped tables you can choose from.


A lot depends on the age of the children.  I know our lower elementary teachers generally have horseshoe tables and some flower tables, while our upper elementary teachers generally use kidney shaped tables. You also need to take into account how it works for the teacher.  For me, the kidney table just wasn't a favorite.  All of our classrooms also have an extra rectangular or trapezoid table in them. When I push-in to other classrooms for guided reading, those are the tables I generally use. However, when I am working in my classroom, I am happy to have my horseshoe table to work at!

Do you have a type of table you prefer?

* * * * * * * * * * * * * * * * * * * * * * * * * * * * * * * * * * * * * * * 
By the way, I am well aware that I posted on January 1st about posting more regularly and them promptly disappeared for 19 days.  I actually have posts ready to go but totally forgot to schedule their posting.  Blogging fail!  Sorry about that. The good news is that there are posts already written and ready to be published. 


Sunday, September 8, 2013

Reading Response Form Letters for Upper Elementary Students: Beginner Level

Recently, I received this email from a reader:
Hi there, I have been following your blog for quite sometime and would like to ask a quick question of you.  I have been using reading response notebooks/letters with my 5th graders for 8 years now and am still struggling with what is the best accommodation for my inclusion special education students.  I have 5 students this year with limited writing abilities. Do you use a cloze template for them to fill in?  If so, so you have an example one?  We have used verbal response, a scribe, cloze paragraphs, shortened response, etc. and I'm still wanting something a little bit different.  Thanks for your help and hope your school year is going well.    
There was a huge response to my posts back in 2011 on how I did my reading response letters back then. I had posted explaining how I set up my reading notebooks. I also did two separate posts on how I modeled writing a reading response letter, here and here.  At the time, I was working with enrichment students who had no difficulty in writing those letters.  Currently, I work primarily with students who sometimes have significant difficulty in writing even the most basic of response letters. While they aren't special education students, I completely understand the situation that email stems from!
Thesis Statement

As I worked more and more with my new students, I could see that they definitely needed more support in writing the letters.  As I noted, they weren't inclusion special education students, but there were still  many for whom the task was just too overwhelming. Cognitively, it was too much to put together.  There was deciding what to write about, then connecting that writing topic to selected information from the book to include in the letter.  There was getting all that thought together, and then putting it all in the specific format of a friendly letter.  For children who are struggling readers and writers, this is a tremendous task.

To help those students, I created a number of reading response form letters that address some different thinking stems (comprehension strategies.)  There is nothing cutesy about these letters.  I didn't put in borders, clip art, or use fancy fonts.  It's a basic form letter to fill in.  There's a reason for this.  My goal is that eventually my students are able to take a plain piece of lined paper and generate a letter on their own. I want my form letter to look very much the way the letter will eventually look in their notebook or lined paper. I also wanted nothing visually distracting.  I am focused on the content, and since I'm asking them to write in letter form, providing the format.  Content is exactly what my plain form letters focus on and modeling the format provides familiarity with it as they use the forms.


There are 13 letters in all that focus on setting, character, plot, making connections, asking questions, visualizing, inferring, predicting, plot, summarizing, synthesizing, an open response for fiction and non-fiction.
You can download the letters by clicking HERE.   It is a PDF that I uploaded in to Google Docs.  There shouldn't be any problems downloading them, but I know there are always a few people who have some trouble with it. For that, I apologize.  I would love to trouble shoot that for you, but my tech skills are just not that advanced! :-)

These letters are meant to be a tool in helping our students transition to writing independently.  However, there are students that will need extended time using these letter forms.  There are students that will need these types of forms for most of the year, if not all year.  That's okay!  It depends on the child's needs.

Now, let me tell you why you may not want to use the letters at all!

I do want to note that I strongly suggest not getting caught up in letter writing as your only form of reading response.  For upper elementary students, I like it because it is a way to organize their thoughts in a form (paragraphing) that will be necessary if not required as they head to middle school. But never forget that the content is of primary importance.

If you have a student that simply can't master using friendly letter format independently no matter how many times you show them or they practice using it, stop requiring it of that student.  At least for a while.  After all, you are asking for these responses to see if students are effectively applying reading strategies, if they are monitoring for comprehension, if they are extending their thinking. Think about what the goal is here.  It's not to see if they can write a friendly letter.  When the letter just isn't working, we may need to start providing variety in their reading response opportunities.

We've often been told our students need to be writing reading response LETTERS.  And, hopefully if you are doing that these form letters are helpful to you.  But, what they should be telling us is that students need to respond to their reading.  That response can and should take many forms and be as varied as your students' needs. Some alternate responses to a letter format response include:
  • Conferencing - A conference discussing the book where a teacher takes anecdotal notes can be very useful for students who simply have difficulty getting the hand to write what he brain knows!
  • Graphic Organizers - Some students need the visual organization a graphic organizer provides.  They also often allow a student who is limited in writing stamina to give specific, succinct answers in each section.
  • Identify Key Words - There are a few ways to do this. Here are two examples.  One way could be, if you are looking for the student to respond with character analysis, to jot down three or four character traits on a piece of paper.  Have the student circle one and at the bottom of the page explain why they chose that trait.  Of course, you want them to explain what in the text makes them choose that word.  The support comes in that you have provided the possible character traits.  Another way to do it for non-fiction is to jot down a few words related to the topic.  Have the student choose the word that is most important to the book and tell why.  This is definitely higher level thinking.  We aren't trying to get away from higher level thinking, but instead looking for other ways to show it beyond a reading letter.
  • Sketching - Have the student sketch the most important scene and explain what is happening and why it was important.  Or, have them sketch and label the character.  They can label with three things we can see and three things we know but can't see.   Notice I said sketch, not draw.  It is not meant to be an art project but a reading response.  A quick sketch should do the trick!   
  • Record It - Write some general, key comprehension questions on index cards.  Give one or two to a student and have them record their answers verbally.  Hopefully, most schools have simple microphones for the classroom computer that make this easy to do.  
Those are just a few ideas.  Some are easy, and some require a bit more work.  But, what they all do is provide alternate response choices that might better fit the needs and abilities of certain students.  One of the most important things we can remember as teachers is that; 

Fair isn't everyone getting (or doing) the same thing, 
but everyone getting what they need to succeed.  

Reading response letters are just one way of doing it. So, please keep that in mind as you use these letters or if you go back  to my previous posts and follow my reader's notebook letter format.

By the way, if not using the form letters for a weekly reading response letter, throwing some in a folder can make a quick and easy literacy center.  I've also found them useful in my guided reading groups where time is so limited. If you decide to use them, please take a minute to comment and let us all know how.  You never know when your idea may be exactly just what someone else was looking for!


Saturday, August 31, 2013

Do You Know Library Mouse?

Today, I'm sharing a picture book that is probably better suited to the younger set, but was one I used with my summer school friends who did not see themselves as writers at all.  Library Mouse by Daniel Kirk is the story of a mouse, Sam, that lives in a library. Sam also loves books and loves writing books.  In fact, he finds some scrap paper and writes several books that he displays in the library.  They become a huge hit with children and adults.  Everyone wants to know, "Who is the author?"  Eventually, Sam makes a "Meet the Author" box.  He put it out one night, and the next morning everyone took a look in the box to meet the author.  Here's the catch. In the box is a mirror. You are an author! Next to the box, Sam leaves a bunch of mini booklets like the ones he writes in for the children to author their own books.  This is a great book for teaching children that they are indeed authors.

If you don't know the book and are interested in it, here is  a video of a librarian reading it aloud. They do a good job of letting you see the text and illustrations as she reads.  You should know she has an English accent which actually makes it sound maybe kind of cool.  You should also know she has a puppet that helps her introduce the book.  I found the puppet to be a bit creepy! Why is its mouth always open?! Once you get past her intro, the book reading goes well.

Library Mouse is just the first in a series.  Daniel Kirk has written several books staring Sam, our friendly mouse.

There's Library Mouse A Friend's Tale  in which Sam does some collaborative writing with a child.  Library Mouse A World to Explore  introduces us to Sam's friend Sarah who isn't much on writing but is in to research and exploring.  In Library Mouse A Museum Adventure,  Sam and Sarah go on an adventure that combines research and journaling.  Finally, there is Library Mouse Home Sweet Home which is due out in September 2013. Amazon has a release date of September 3rd. This book continues the adventures of Sam and Sarah when the library is under renovation and they must find a temporary home.  I haven't read it, but it sounds like this one could be good for a social studies/community tie in as they make an igloo, a castle, a modern house, and more.

As I wrote, I think these books are better suited for the younger set, but my 3rd going into 4th graders enjoyed Library Mouse very much.  And, the message that they are authors certainly hit home.  In fact, to really make an experience of the book you could easily make the "Meet the Author" box that Sam makes.  Just put a small mirror in a tissue box, wrap the box leaving the top hole open, and make a "Meet the Author" sign.  It would be a fun way to introduce writer's workshop at the start of the year.

You can also make some mini books for your kids to write their own story or a mini "About Me" book as a back-to-school activity.  Here's a quick video on how to make an 8 page mini book using one piece of paper and no staples.  It looks just like the mini book Sam makes!
I linked to Daniel Kirk's author page earlier in the post.  If you explore his web site, you will see that he also has an activities page where you can print out book marks, posters, and coloring pages.  There's a cute poster of Sam saying, "Be Kind."  There are also suggested academic activities for his books.

Library Mouse isn't a brand  new book, but it is a good one! Plus, Daniel Kirk is a New Jersey author. How could I not brag about a fellow New Jerseyan?  If you live in the area, Daniel Kirk does paid author visits. His web page also notes that he does FREE twenty-minute Skype visits for classes doing an author study, schools with limited funds, and those too far from New Jersey.  Did I mention FREE? :-)

***********************************

One off topic question for you!  Does anyone out there use Remind 101?  I've downloaded the app, but I am hesitant to use it.  Just wondering if anyone else has used it and how it works.


Wednesday, August 28, 2013

A Project and Some Bookmarks

So, I mentioned in my last post that I was going to tell you about a project I completed inspired by a picture I saw on Instagram.  It was actually a craft project done by Hope King over at Second Grade Shenanigans. I love her blog.  She makes so many great printables.  In fact, Hope made the Good Reader posters I used for decorating outside my door this year. It was the project picture I saw on her Instagram page that led me to her blog and the reading posters.  But, back to the project.  Here is what my final project looks like!

Totally inspired by Hope's masterpiece. . . 


A pretty good match I think! When I saw Hope's pictures, I knew I had to do it. The READ display fit right in with my literacy themed room.  I'm not going to give any directions here, because you really need to hop on over to Hope's blog and see how it's done!  After all, she did master mind this project!  I will give one thought.  This took me WAY longer to do than it did Hope.  I mean WAY, WAY longer!  Obviously my crafting skills are not on par with hers! So for me, it was time consuming but worth it.

One of the reasons I like it is because the vibrant colors. . . 

. . . fit right in with the colors of my class library baskets! 

But, you could pick any colors that match your room.
I put the display up high to leave room for anchor charts, posters, and student work.

I will say that one of the things you have to do for this project is cut 24 squares for each circle.  Well, that left me with a lot of scrap pieces.  It turns out that each scrap piece made two perfect bookmarks for my friends.  24 x 2 x 4 = 192.  That's 192 bookmarks!  I used card stock for the project so they are sturdy.
 
I went to the dollar store and grabbed a couple of packages of stickers to fancy them up a bit. I put them on while watching TV one night.  How much school work gets done that way?!   I was going to laminate them, but then I came to my senses rather quickly when I realized that would mean cutting out 192 individual bookmarks.  So. Not. Happening!

Thinking on it more, I realized these are perfect for my guided reading groups as they are and have a ton of uses. The backs and most of the front are blank. These are prefect to have on hand to do things like. . .

  • You can easily write the focus skill/strategy on the bookmark for your friend to have as a reminder when you send them off.  
  • The kids can use them to write interesting words as they are reading.
  • You can write a question for them to answer at the guided reading table after they read a section.
  • A reading goal can be written on the bookmark as a reminder for the student. 
I'm sure you can think of many other things to do with these.  Even if you don't make the project, it would be nice to cut up some colored card stock as blank bookmarks for use in your guided reading groups.  Actually, you could even use small, colored index cards if you don't want to do the cutting.
 So, that's the project and a sneak peak at one area of my room.  
I'm still working on the rest, but getting close to being done!


Sunday, April 7, 2013

Questions About Anecdotal Records in Reading

I am in the process of putting together a tutorial of sorts on how to take and use anecdotal records during reader's workshop.  It is something that is somewhat new to many of my super teacher colleagues and has generated a lot of questions. 

Some of the big questions I have heard are:
 
What exactly should I be writing down?
When should I be taking notes?
How do I take notes on a whole group?
What do I do with those notes?
How do I translate my notes into grades?
 
 
These are all really important and valid questions, and I do have definite answers for them.  My position on these questions is based on what I know has worked well for me and what are best practices.  However, I have to combine that with the constraints of the reading instruction implementation and assessment expectations within my district to provide something that helps my super teacher colleagues. 

The answers to some of those questions can vary slightly depending on the constraints of your district.  For example, mine does not yet use a standards based report card.  So, the question regarding the translation of notes into grades may be answered differently for us than it would be in a district using a standards based report card.  If you even believe the notes should be used for summative grading purposes!  Personally, I fall firmly in the formative category but as I noted, we must all work within the parameters of our district's implementation.

One of my definite positions on the topic is that I believe tying your notes to the CCCS is a must.  I have not seen a whole lot out there that does this.  If we are using the standards to delineate what our students need to achieve, how can we not use them to guide us on instruction and assessment?  Using the CCCS to assist in taking anecdotal records is just one part of the tutorial I am working on.  I've also been doing a lot of professional reading on the topic.  Once I finish putting it all together, my plan is to share it all with you here. No date on that yet, as I am still in the beginning "work in progress" stage, but it will probably be at the end of the summer.

However, before I pull all this together, I would love to hear some thinking outside of my district. There are so many different methods and forms for taking notes and so many varied ways to use them. It can be very easy to become overwhelmed by all the note taking. I would love a better idea of what struggles and success others have had when it comes to anecdotal records in reading. 

If  you have a minute, please take a few and let me know what your struggles and success have been with anecdotal records in the comment section.  Please feel free to let your comments be a long as they need to be!  I know this is a broad topic, and I truly appreciate the time you take in offering your thoughts. 

Tuesday, March 19, 2013

Personalized Sticky Notes for Reading

I've been working with my small group friends on comprehension skills.  I know, who hasn't been doing that! :-)  One of the areas they needed a great deal of help with was monitoring their thinking as they read.  They would often just read through without any real understanding of what was happening in the text.  Or, they read on thinking they get it, yet when we discuss their reading they have significant misconceptions or have totally missed the important points of the text.  They simply did not self-monitor as they read. 

To help with this in their independent reading, we have been working on Stop! Think! Jot!  It is literally what it says.  Stop after reading a certain amount.  Think about what you are reading.  Do I understand what is going on?  Jot down a thought about it.

To begin, we worked on Stop! Think! Jot! as a tool to "check-in" with our mind to make sure we understand the text.  The "think" prompt was simply; Do I understand what is going on in this part?  Can I retell it in one or two sentences?  Those one or two sentences would be the Jot! part.  To help with this, I placed sticky notes in strategic spots in their independent reading books.  When they hit a sticky note, they had to jot down that one or two sentence retelling.  Having to put it in writing really stopped many of my friends in their tracks at first.  I would see them start to write, stop, put their pencil down, and go back to reread.  This shows me that they really didn't have full comprehension of their reading the first time. Most of my friends have improved tremendously with monitoring their understanding of the text.  Most now do it without the prompting of a sticky note.

We then moved on to making connections, asking questions, making predictions, or just noting our thoughts about the book, interesting words, etc.  In guided reading, I select the sections we read and where we stop to think and discuss.  However, when my friends are doing independent reading, they still need some guidance on when it is time to stop and think.  Even at this point in the school year. (insert sigh here) They are getting better, but  I still have a select few who will read through the text without ever stopping to think about the text.  I know that they are mentally stopping to "check-in" and make sure they understand, but then they just keep going.

Much like I did in the beginning of the year when we worked on monitoring comprehension, I strategically placed sticky notes in their independent reading books reminding them to jot down a thought.  I ended up writing a lot of sticky note reminders!  Now, I know there are tutorial and templates on how to print on sticky notes.  That link will take you to a great post on the blog Ladybug's Teacher Files that shows you just how to do it and includes templates.  I think that's great, but I have this fear of jamming my printer.  And honestly, I just don't want to print my own sticky notes. If you want to, great!  It just wasn't for me,  I needed a better way.

I ordered these personalized sticky notes from Vistaprint.  Vistaprint allows you to personalize just about anything for very reasonable prices.  The pic is a little fuzzy because I took it off a screen shot of my order form.
I created a sticky note that reminds my friends of exactly what they need to do and provides a spot to write the page number.  This is great for when we "write long" from a sticky.  I ordered ten pads of 50 notes each for $22.49.  Not a bad price for 500 personalized sticky notes.  They should last me a while as I only need them for a select few friends, don't overload their books with them, and use the printed notes to graduate them into doing it using their own blank sticky notes when they find a "sticky worthy" spot in their book.

This might be a good time to point out that while I do place these sticky notes in their books, it's important to just do a few.  My main goal is that they read with understanding.  If I overload their book with sticky notes it becomes more of a writing assignment.  It also steals some of the joy of reading. 

When I worked with my enrichment students, they would actually Stop! Think! Jot! to death.  I have  had some of my lower ability students do this as well.  Their books would look like a peacock in full plumage with sticky notes bursting out.  For them, one of the big lessons I would always do revolved around the idea that when everything is important, nothing is important. However, some of my friends this year still need the prompting that sticky notes placed by the teacher provides.

I love that Vistaprint allows you to personalize so many different things.  In the past, I have ordered thank you cards for my classroom, punch cards for rewards, and more.  In fact, with my sticky note order I also got something fun and motivating for my friends that I will share in another post.  By the way, Vistaprint is in no way sponsoring this post. They don't even know I exist other than to bill me and send me the goodies I order! :-)

Sunday, May 27, 2012

Lapbooks and Cheesecake!

Let me take a minute to address my post regarding Staples new rewards program for teachers.  I thank everyone who commented.  It seems I am not alone in my dismay with this revised program.  Please, reach out to Staples and let them know how you feel, whether you agree with me or agree with them.  It is important for our voices to be heard either way.  I would love to see them revert back to the old program or at least offer up some reason as to why the change was necessary.

* * * * * * * * * * * *

I wrote a post a while back about foldables and lapbooks.  If you haven't seen the post, go visit.  I was able to link to some great pdfs of foldable books by Dinah Zike, the queen of all things foldable! :-)  I used some of her foldable ideas on lapbooks my friends were working on recently.  I have done lapbooks on occasion before, but they are not a staple in my teaching for one main reason; they take a long time to get done!  While I do believe they are worth every minutes spent on them, the current curriculum I have to follow does not allow me to linger.  I know that they can be done in less time if you do them on a smaller scale, but mine always seem to take on a life of their own! 

I like doing them because you can really do so much with them.  Most importantly, my friends love the project feel of it all.  Every time I have done them, my friends are always eager to work.  Also, when they see their final project completed, they are a little in awe of themselves.  Love it!

In our guided reading groups, my friends were working in three different books, one on volcanoes, one on King Tut, and the last on the history of Jazz music.  Speaking of which, on a total aside, do you know the Cheesecake song as sung by Louis Armstrong?  If you don't know it, watch this!  I show this to my friends every year, and we end up singing it all year long.  I promise you will have this song stuck in your head!  And, just wait for Bing Crosby to come hopping through!  Too funny!


Isn't that just great!!!!  We will often substitute the word cheesecake with pizza or tacos or any featured lunch menu item. Any two syllable word will work.  Most of my friends are also in their second year of instrumental lessons, so they love seeing some of the instruments they play featured.

Anyway, back to lapbooks!  I thought I would show you some of what we did.  I forgot to get pictures of the Jazz books, but here is some of what my friends did with Volcanoes and King Tut.  Be warned, many pictures to follow!


One of the big lessons for this activity was getting my friends to effectively summarize and show synthesis.  I'm happy to say they did a very nice job.  What was also another perk was the interest my friends had for the books they didn't read. Once they saw the various lapbooks, they wanted to read all the books.

I have to say, I do love doing lapbooks with my friends.  But, for me, it can be very time consuming.  It also requires a lot of pre-planning.  You have to have the foldable papers cut to size and ready to go.  You also have to carefully plan what you will be doing with each section.  You also need to be prepared for that friend whose fine motor skills make a mess of the folding!  Always have some extras ready to go!

Having said that, I will definitely be doing lapbooks again next year.  :-)

Saturday, March 24, 2012

Calling Guided Reading Groups

How do you organize for guided reading?  Now, I know that's a loaded questions because there is so much to plan for.  I am asking just about how you call your groups and how students know what groups they are in.  I am going to share my method, but I am on the lookout for something that might work better.
Paint chips come into play again.  I group my kids by color. They are actually grouped by reading levels at the moment, but they don't know that!  Since the groups are flexible and always changing, I need a way for my friends to know what group they are in and who is meeting that day.

On my dry erase board I have an A and a B.  During guided reading, my class works in centers except for the two groups I will be meeting with that day.  The A group is the group that comes immediately to the meeting table.   My guided reading time is very limited.  I am REQUIRED to meet with two groups in thirty minutes.  To maximize the time we meet, my B group has to be ready to go.  The B group doesn't work on centers. Instead, they have independent reading time until I finish with group A. If I had to wait for them to put center materials away, we would never meet. 

Anyway, here is what my board looks like.
I taped a piece of white card stock to the paint chip and laminated it.  Then, I stuck some magnetic tape on the back.  I just use a dry erase marker to write my friends' names on the white part.  Next to the letter A, I put the color group I will be meeting with first, with the B group being the second group I will meet with. 

I tend to have five groups.  I made a sixth orange card for random groups I pull for specific skills.  My other groups are flexible groups, but tend to stay together longer because we are reading novels or doing lap books, all of which take a while.  The orange card allows me to pull as I need to from the other groups to touch base with students I notice have a common need.  I'll meet with them once or twice to hit the skill or strategy in question.

In my guided reading area, I extend the colors to my folder bins and teaching drawers.  My friends have a guided reading folder to hold the materials we are currently working with.  I just printed a color card that I can write their names on.
Next to that, I have my drawers where I keep the teacher materials I need for each group.  It's an easy way to organize for the week.  I can just throw in whatever I might need and we are good to go.

So, that's kind of how I let my friends know who is meeting today and keep myself organized.  Do you have an easier, more effective way to do it?  If so, please share!  This has been working for me, but I'm always open to new ideas.

Wednesday, March 14, 2012

Book Talk with a Little Bit of Pi on the Side

Before I get to book talks, let me say how much I appreciate all your comments regarding teacher observations..  It was really eye-opening to see the wide variety of practices in place.  I also wasn't aware that tenure had been completely abolished in some states.  It makes for interesting thought to see that we all have the same job with the same important goal of educating our youth, however what we do is open to such a variety of rigor in its evaluation.  Gave me a lot of food for thought.

Moving on. . .


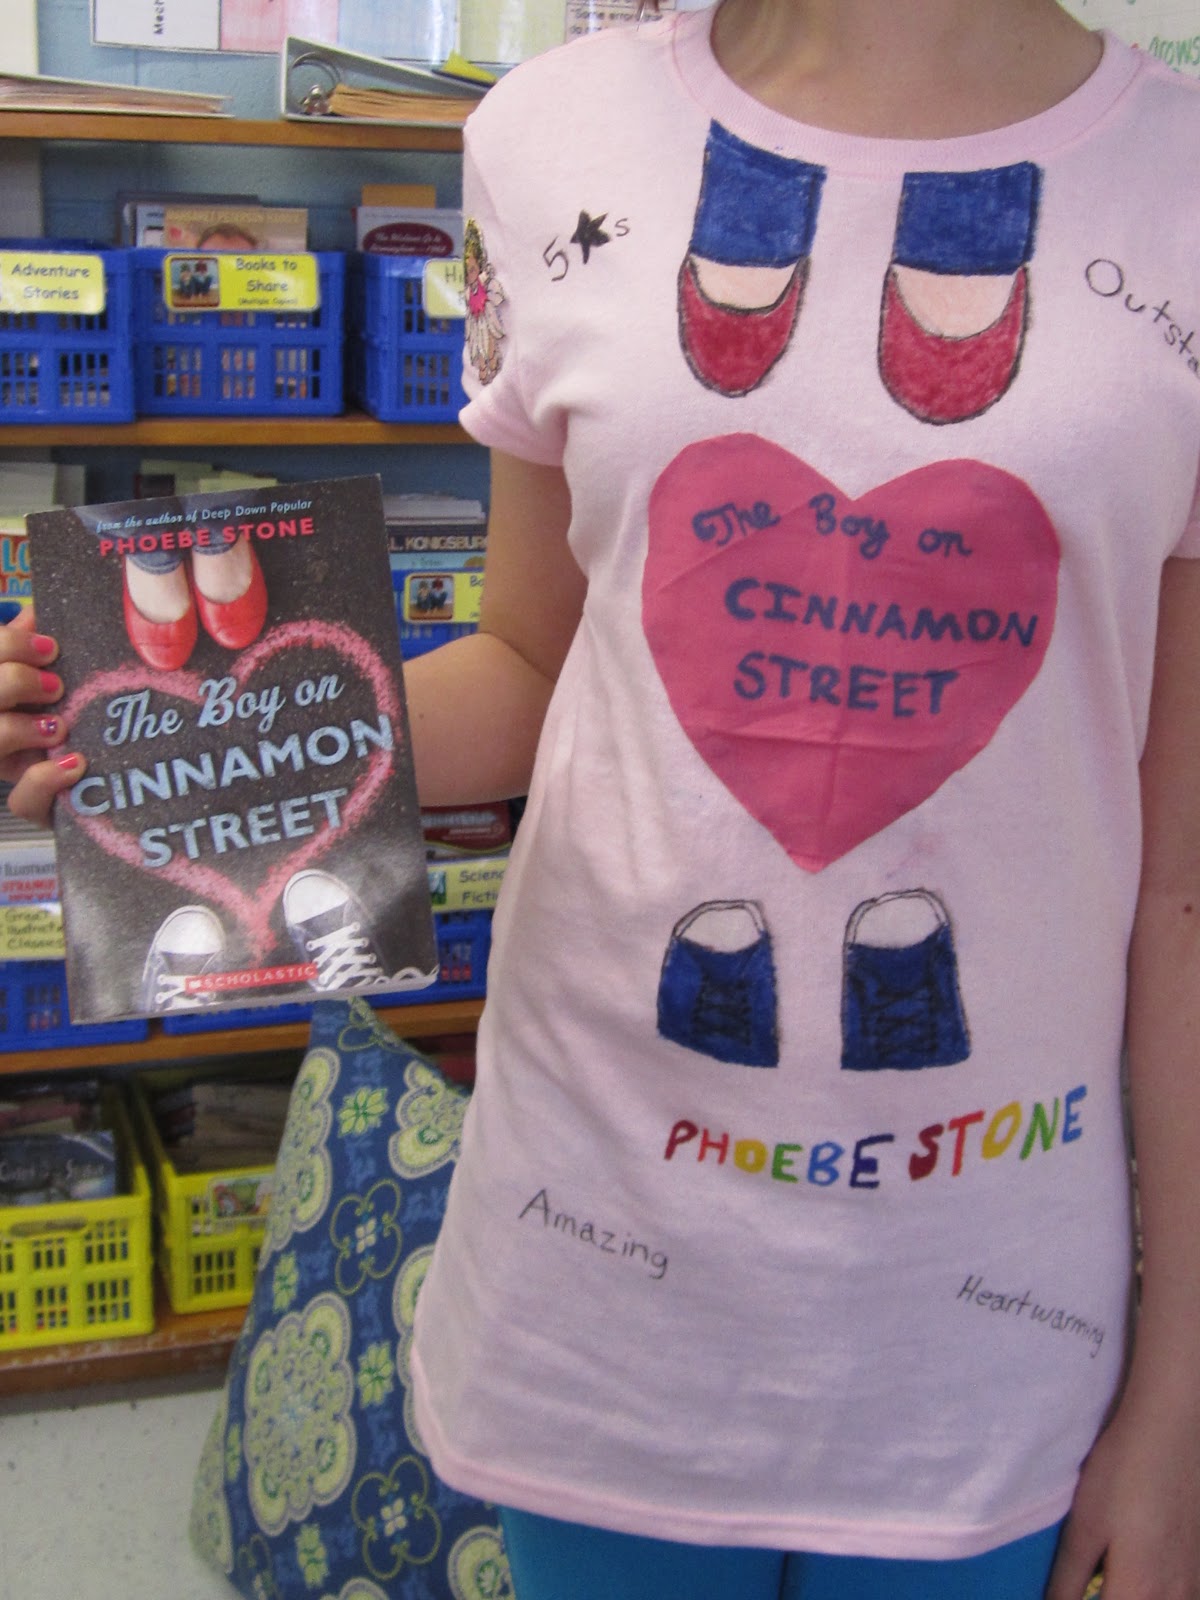
My friends conducted book talks this week.  Overall, they did a really good job.  They were to sell their book as if they were giving a cheesy infomercial.  Kind of silly, but lots of fun.  They had to summarize their book and "sell" it to their classmates without giving away the ending.

As part of the project, they also had to create a t-shirt that reflects the book.  One of the main things I noticed at this book talk was how much better their public speaking skills were from the book talks we did last month.  I don't know if it was the cheesy infomercial effect, but most had memorized their talks rather than reading them from note cards.  They also had a lot more eye contact and variety in volume and inflection when they spoke.

I thought I would share some of what they did.  Since I can't show faces, I took two pictures.  One for our school blog and then another without their head for this blog.  Yikes!  That sounds so mean, to have cut their heads off in the pictures.  I just didn't want to take the time to blurr out the faces!  Let's just say this will allow you to focus without being charmed by a bunch of cute smiles! :-)

I categorized some of the pictures. 

  • Here are few of my nonfiction readers.
This friend read Favorite Greek Myths by Mary Pope Osborne
I love that he created a glossary of the gods on the back of his shirt. 

This friend read a biography on Dr. Martin Luther King Jr.  She found it really interesting because she said kids always learn the same thing about Dr. King every year and through reading this book, she was able to learn new information.  Out of the mouths of babes! 

This book was a huge hit.  If you can think of any mythical monster, it is in this book.  It really was varied.  We read about creatures like Cerberus to the Jersey Devil.  His t-shirt was made of some of his favorite creatures.  It was good, but I would rather he drew them or made them in some way.
  • The next crop of pictures are from a group I call my Girly Girls.  If there is a book about a boy, shopping, and nail polish this group is all over it!  I often have to remind them to stretch themselves as readers.  However, notice the book choices when left on their own.
I think you get the picture! 
  • This next group would be some of my advanced readers.  They are a tough group.  They have very high reading levels, but finding books can be tough because the content is not always appropriate.  These books were chosen from at-home reading with parent approval.  In the classroom, I'm not sure I would have given a green light to all these books.  I find with advanced readers, they get caught up in being able to read advanced books, but don't really have the skills yet to deeply comprehend what they are reading.
Hands down my favorite shirt!  Look at the face of the boater.
If you are going to read Jaws by Peter Benchley, this is the perfect t-shirt!
Not a lot of information on it, but her book talk was great.
I should note that they all had more information about the book on the back of their t-shirts, but I figured we are already on picture overload without my posting two pictures of each.
Here's the funny thing about this particular book talk.  One of the rules was that you could not give away the ending of your book.  My friend who read the Hunger Games gave a great recap without telling the ending.  Of course, did I think about that when this friend got up to talk about the sequel, Catching Fire?  Oh my!  You should have hear the groans when in the course of talking about this book she totally told the ending to the first book.
  • This last group of pictures is just a mish-mosh of different books my fifth graders are enjoying.


UPDATE (6/2013)  I have to thank you all as this is one of my most popular posts.  Over a year later I still get emails asking me for the rubric I used with this project.  I'm sad to report that I have looked high and low and just can't find it.  I have looked on my computer and even went through my files hoping I had a hard copy on file.  Nope. :-(  But, any rubric you would use for an oral book report would work.  

  Okay, one more UPDATE (6/2014)  Believe it or not, I still get emails asking me for a rubric for this project.  I still don't have one for ya!  BUT, I found a great one that will work beautifully.  It's a Teachers Pay Teachers product by Runde's Room, a great blogger with an amazing blog!  She has created a book talk pack that includes an information sheet, student guideline sheet, information organizer, and a rubric for assessment.  You can click HERE to go directly to the product.  I purchased it a while back, and can tell you it will work well with this project.  It wouldn't include the t-shirt for scoring, but you could just add that in and I think that would be easy to do if you follow what she did on the rubric.  Anyway, hope this helps those of you still looking for a book talk rubric.


So, that is what my friends have been up to this week.  Well, that and today was PI DAY!!!  We had a lot of fun.  The four other fifth grade teachers I work with and I rotated among the five classes doing different pi related activities.  Part of my activity was a reading of the book Sir Cumference and the Dragon of Pi by Cindy Neuschwander.
It's actually part of a series of books that does a fantastic job in explaining some geometry concepts in a very entertaining way.


We finished the day with pie, of course!  In all, my parents sent in eleven pies for twenty five children.  Yeah, I have a serious pie belly right now! But, oh it was good!
How was your pi day?