Showing posts with label Writing Workshop. Show all posts

Saturday, August 31, 2013

Do You Know Library Mouse?

Today, I'm sharing a picture book that is probably better suited to the younger set, but was one I used with my summer school friends who did not see themselves as writers at all.  Library Mouse by Daniel Kirk is the story of a mouse, Sam, that lives in a library. Sam also loves books and loves writing books.  In fact, he finds some scrap paper and writes several books that he displays in the library.  They become a huge hit with children and adults.  Everyone wants to know, "Who is the author?"  Eventually, Sam makes a "Meet the Author" box.  He put it out one night, and the next morning everyone took a look in the box to meet the author.  Here's the catch. In the box is a mirror. You are an author! Next to the box, Sam leaves a bunch of mini booklets like the ones he writes in for the children to author their own books.  This is a great book for teaching children that they are indeed authors.

If you don't know the book and are interested in it, here is  a video of a librarian reading it aloud. They do a good job of letting you see the text and illustrations as she reads.  You should know she has an English accent which actually makes it sound maybe kind of cool.  You should also know she has a puppet that helps her introduce the book.  I found the puppet to be a bit creepy! Why is its mouth always open?! Once you get past her intro, the book reading goes well.

Library Mouse is just the first in a series.  Daniel Kirk has written several books staring Sam, our friendly mouse.

There's Library Mouse A Friend's Tale  in which Sam does some collaborative writing with a child.  Library Mouse A World to Explore  introduces us to Sam's friend Sarah who isn't much on writing but is in to research and exploring.  In Library Mouse A Museum Adventure,  Sam and Sarah go on an adventure that combines research and journaling.  Finally, there is Library Mouse Home Sweet Home which is due out in September 2013. Amazon has a release date of September 3rd. This book continues the adventures of Sam and Sarah when the library is under renovation and they must find a temporary home.  I haven't read it, but it sounds like this one could be good for a social studies/community tie in as they make an igloo, a castle, a modern house, and more.

As I wrote, I think these books are better suited for the younger set, but my 3rd going into 4th graders enjoyed Library Mouse very much.  And, the message that they are authors certainly hit home.  In fact, to really make an experience of the book you could easily make the "Meet the Author" box that Sam makes.  Just put a small mirror in a tissue box, wrap the box leaving the top hole open, and make a "Meet the Author" sign.  It would be a fun way to introduce writer's workshop at the start of the year.

You can also make some mini books for your kids to write their own story or a mini "About Me" book as a back-to-school activity.  Here's a quick video on how to make an 8 page mini book using one piece of paper and no staples.  It looks just like the mini book Sam makes!
I linked to Daniel Kirk's author page earlier in the post.  If you explore his web site, you will see that he also has an activities page where you can print out book marks, posters, and coloring pages.  There's a cute poster of Sam saying, "Be Kind."  There are also suggested academic activities for his books.

Library Mouse isn't a brand  new book, but it is a good one! Plus, Daniel Kirk is a New Jersey author. How could I not brag about a fellow New Jerseyan?  If you live in the area, Daniel Kirk does paid author visits. His web page also notes that he does FREE twenty-minute Skype visits for classes doing an author study, schools with limited funds, and those too far from New Jersey.  Did I mention FREE? :-)

***********************************

One off topic question for you!  Does anyone out there use Remind 101?  I've downloaded the app, but I am hesitant to use it.  Just wondering if anyone else has used it and how it works.


Saturday, August 17, 2013

Author's Chair ~ Share Chair

Many years ago, I spent a lot of time making an author's chair.  If you aren't sure what an author's chair is, it is "just" (Not really "just," but there's more on that at the end of the post) a fancy chair your author-students sit in when reading their work to the class.  Somehow, one year, my chair disappeared from my room.  I'm pretty sure it was probably broken misplaced one summer during the room cleanings.  Lately, I've been toying with the idea of creating a new author's chair.  While the summer has flown by, I've not abandoned the idea.
I have an old, wooden chair like the one above that would be perfect for the project.  In fact, I turned to Pinterest for some inspiration and was so amazed at how creative my fellow teachers are that I decided to share some of it here.  The pictures are from the teachers' blogs or their Pinterest boards, and I have tried to link directly to each.  However, some of the pictures had no blog or site linked to them. The just linked back to the image.  If you know who a chair belongs to, please leave a comment and I will happily add the link to the teacher's blog, Pinterest board, or web page.

Let's begin with some . . .

Author's Chairs!

Lauren is not a blogger, but a pinner!  She pinned her author's chair on her Pinterest board: My Creations. Instead of a standard chair, she used a director's chair.

Angie Austin is an artist that paints author's chairs for teachers.  Below is one featured on her blog.  If you visit her blog, you can see some others she has designed.

Stephanie Mellon painted this chair for her classroom.  She doesn't seem to have a blog, but posted her picture on her Pinterest board. Her chair is amazing!  Her picture collage below shows you the many steps involved in this project.

Here's  another great chair from Pinterest that only links back to the image.  I love the pencils painted across the back.

Here's another amazing chair that links back to an image.  This chair looks like it took a lot of time, effort, and love of teaching!

The chair below is painted by Priscilla Zachary for her school teacher daughter.  As far as I can tell, Priscilla also doesn't have a blog, but posted her picture on her Pinterest board that you can see here. Priscilla is very talented as evidenced by this amazing paint job!

This picture also links to the image on Pinterest, but I had to include it for its simplicity.  If you don't have time to paint a chair, simply grab some ribbons, a chair cushion, and some Sharpies.  No painting needed.  Also, this chair could fold up for easy storage when not in use.

Share Chairs!
Share chairs are nice because they aren't limited to author's use only.  
You can use a share chair for any kind of presentation.

Heather, from Fifth Grade Frenzy has created a super snazzy share chair. I like this chair because it fits in with my room's color theme this year.

Ms. K at Teacher Blog Spot shares a genius idea for a quick, cheap, and easy share chair a teacher in her building came up with.  All you need is a plastic lawn chair and some stickers.  Imagine how cute this would be with a lawn chair in a cute color and some themed stickers.

Stools!
Who needs an actual chair? Stools takes up less space and need less paint!

Amanda at First Time for Everything has added some fun pom-pom trim to her stool.

Beth, the Inspired Writing Teacher, has this very colorful stool as an author's chair. If you follow the link to her blog, you will see that she also has an actual author's chair, too.


Here's another colorful stool posted by Kelly on her Pinterest board that is used as an author's chair.

All Purpose Celebration Chairs!
An all purpose celebration chair is more of what I had in mind for my classroom.  I like a chair that you can do an author's celebration in as well as be a reward chair to sit in for good behavior or birthdays.  

Hope at 2nd Grade Shenanigans made a most amazing chair.  Love the feathers!  You can hardly tell, but the chair is a basic wooden school chair.  Hope shows you the before and after in her blog post. I love her blog! 

Debbie Clement is an author/illustrator who visits schools.  She took the picture of the chair below on one of her visits and posted it on her blog, Rainbows Within Reach. Imagine the possibilities with a chair labeled Imagine!

Here's a really fun chair for those not into painting. Mel D. at Seusstastic Classroom Inspirations made this awesome celebration chair using tissue paper, old Dr. Seuss books, and Mod Podge. Love it!

And, Finally. . . 
How about a reading BENCH?
I love how so many favorite books have been incorporated in the paining.  I also love all the books laying on the seat.  I'm not sure I'm talented enough to pull off something like this!  Again, this is a picture that only links back to an image, but I would love to know who created this gem.

Here's an amazing idea!  The Ethelbert B. Crawford Library in Monticello, New York had children paint reading chairs and auctioned them off.  If you follow THIS LINK, you can see several of the chairs the kids created.  The library was able to raise $1300!  If your school has some older chairs, wouldn't that be a great art/literacy project?  Instead of auctioning them off, they could be great additions to the school's media center or front office.

There's more to the author's chair than "just" a presentation seat.  When an author is in the chair, it is a time for the reader author to practice public speaking, fluency, and prosody. There is also the joy they get from seeing the power of their words.  I will always remember a time a friend was reading a story to the rest of our class that had a very funny moment in it.  When he read that part, the entire class laughed so much that he had to pause in his reading.  When he was done, I pointed out to him (and the class) that his written words had the power to make an entire group of children laugh for quite a while.  His words made people experience joy.  I told him, and the class, that THAT IS THE POWER OF AN AUTHOR!  The look on his face was priceless.  He really hadn't understood until that moment that words have power and as the author, he wields that power.

For listeners, it is a time to practice active listening skills and social skills for audience behavior.  Often, during author's celebrations, the class is asked to respond to the author with one specific compliment and a question.  You can't do that if you aren't actively listening!

If you are new to using an author's chair or just want some ideas on how to make it more meaningful,
here are a couple of resources that might help:

  • Click here to see how Teacher Vision has outlined exactly what an author's chair is and how to use one.
  • The Oakland Unified School District,  via their Writing Proficiency Project, has a nice printable of tips for making your authors' chair a successful experience for all.  Click here for the pdf.
   In addition to showing some great chairs, the links will take you to some great blogs to explore.
Hopefully, you have found some chair inspiration! 


Saturday, April 27, 2013

The Most Important Conversation: Teaching the Use of Dialog in Writing

One of the things I miss most this school year has been teaching writing.  My day is spent in either guided reading groups or small supplemental groups for math and reading.  Rarely, do I get to focus with students on their writing skills. I am surprised at how much I miss teaching it.  

However, I was talking to one of my colleagues the other day regarding some trouble she was having getting her students to include dialog in their writing.  After talking about it for a bit, I was able to offer an idea that has worked really well for me in the past.  I thought I would share it with you.

The problems with dialog in student writing can be many:

  • It's fluff.  They simply write dialog that does not contribute to the piece in any real way.
  • It's overused.  There is dialog everywhere!  Sections that could/should be narrative are turned into dialog. Or, everyone is talking all the time!
  • It's underused..  They can reach an important point in the story where dialog would enhance the mood, convey emotion, build background, or provide information to the reader in an interesting way but they don't include it.  Yet, there might be really ineffective use of dialog at another point in the story.
  • It's not used at all.  I have often read stories with the most interesting characters and shocking events and yet never a word is uttered.
One way to help a student to effectively incorporating dialog is to focus them on what I call "The Most Important Conversation."  I sit with a friend and ask him/her, "If two characters could only speak to each other once in this story, what is the most important thing they would talk about?  What is a conversation they would just have to have with each other? What is it they simply must talk about?"

This important conversation will usually happen at a story point that either takes place in the beginning (to set up the story or build background for the story), at the climax (discussion of that amazing thing that just happened), or at the very end (where they wrap it up.)  If your friend is having trouble identifying where to place the conversation, point out a part in the story where something interesting happens and ask what the main characters would say to each other about it.  Sometimes I have even resorted to role playing where we both pretend to be a character and talk to each other about the story event.

I should mention that prior to this, I have found it helpful to first give my friends a mini lesson on why and when we include dialog. Sit down with your class and make an anchor chart that lists the ways dialog can enhance a story, such as set a mood, advance the plot, provide background to the story, show a character's feelings, etc.   Then, read them some examples from books they know.  I promise they will get it!

After some more discussion to flesh out who will have the conversation, when in the story it happens, and what it will be about, I give my friends one of the sheets below. There are two depending on the writer's ability.  Some will stick to basic dialog while others will write more involved dialog and need more space.   I usually copy the same sheet two sided so they aren't too limited on the length of the conversation.  I then send them off to write this conversation.  Having an organizer like the one below has been very helpful to my friends.  It helps them with the flow of the conversation between the characters.


Once they have the conversation written, we incorporate it into the story.  Now, depending on how much your friends know about dialog you may or may not have to go in and work on tags.  Great time for a lesson on not overusing said and using dialog tags to convey character's feelings.

Essentially, by focusing on the most important conversation, you are teaching your friends that dialog has purpose and can be a powerful tool for a writer.  It's not just put in a writing piece because the teacher says you should or we know it will get us a better score on a state test! Focusing on the most important lesson address all those problems I bulleted at the beginning.  It takes the fluff dialog out of the piece, limits the overuse or under-use of dialog to that one important conversation, and for those that never include dialog at all, it's a first step.

I've included a link HERE WHERE YOU CAN DOWNLOAD AND PRINT THE DIALOG SHEETS SHOWN ABOVE.  Of course, you don't need the sheets to do this.  I just find having the two types of speech bubbles helps to keep my friends visually organized on the flow of the conversation.  

By the way, I included a credit page on the download.  But, just in case you were wondering, the speech bubbles are by by Dancing Crayon Designs  (www.DancingCrayon.com) and the chevron background is from  Designed by Coffee, Kids and Compulsive Lists (http://coffeekidsandcompulsivelists.blogspot.com.au/)  
~~~~~~~~~~~~~~~~~~~~~~~~~~~

On another note,
 I have this little list I keep of experiences that remind me
 "You know you're a teacher when. . . "  
Here's one!


Tuesday, March 26, 2013

2 Picture Books for Writing Lessons

HAPPY SPRING BREAK!

I could not be any happier to be on break this week! 
There is a serious case of  Spring fever bouncing in my brain. My plan is to enjoy the heck out it.  Having free time is such a welcome novelty when you are a teacher.  Sadly, we had a snowstorm yesterday.  Who asked for snow on Spring Break?  Whoever you are. . . STOP IT RIGHT NOW!  It turned out to be more annoying snow than accumulating snow.  But, what to do on a Spring Break Snow Day?  Head to Barnes & Noble!
As you can see from the sign, they too have Spring fever!  I headed over to the children's section to see what was new in picture books.  I saw many familiar favorites, but there were two in particular that caught my eye.  Both books seem perfect for writing lessons.

The first book is Exclamation Point by Amy Krouse Rosenthal and Tom Lichtenheld.  Before I tell you more, let me just say I find it ironic that two people who write a book about punctuation choose to have their proper noun names in all lowercase letters on the cover. Thankfully, all the writing in the book follows the rules.
Exclamation Point is a dual purpose book.  It obviously teaches end marks, but it is also a great book about being yourself.  This little exclamation point tries to be a period and a question, but in the end it must be itself - a loud, proud exclamation point!  And, it is only once it decides to be itself that it is happy and admired by the other end marks.  What a great lesson to pass on to our friends.

I like the book as a good way to introduce sentence types and end marks.  For those friends who continually leave off those end marks in their writing, it would make a fun mini-lesson on how important it is to include them.  Below is a snapshot from the book.  Every time a certain end mark speaks, their sentence ends in their end mark.  Another cute point about the book is that its pages are ruled like primary writing paper.  Something our friends are very familiar with.
I might love this book simply because I am notorious for overuse of the exclamation point.  I'm also very guilty of using more than once even though I teach my friend that just one does the job!!!!!

~ ~ ~ ~ ~ ~ ~ ~ ~ ~ 

The other book I found and loved is One Cool Friend by Toni Buzzeo.  Since my pocketbook limited my purchase to just one book, I had to make a choice between the two.  This is the book that won my heart and my cash. :-)  I must have been living under a rock where this book is concerned because not only is it a 2013 Caldecott Honor book, it was on the New York Times best seller list of children's picture books back in February of 2012.  Where was I when all this was going on?
I love so much about this book!  First, I love that the author, Toni Buzzeo, is a former English teacher and school media specialist.  I also love that  David Small, is the illustrator of this book, but we also know him well from his many, many other illustrated books.  The GardenerThe Library, and So, You Want to be President? are some of my favorites.

One Cool Friend is a fun and surprising story of a little boy, Elliot, and his father who visit the aquarium.  While there Elliot asks his father, "May I please have a penguin?"  Thinking he would like a stuffed souvenir  the father hands him $20.  Little does he know that Elliot means a real penguin.  The story is wonderful.  I promise it will engage your friends of all ages.  There is even a surprise ending that tells us Elliot and his dad have a lot in common. :-)

So, where is the writing connection?  It comes in how the David Small chose to illustrate the dialog.  Take a look at a couple of pages.
Notice how the dialog is bubbled.  Perfect for teaching how to punctuate dialog.  Notice that the second line shows connected dialog. In the picture below, what Elliot is thinking is bubbled differently from actual dialog.
A great way to show the use of internal dialog to your friends. Notice the tags in both pages are different.  In one the father "announced" while Elliot "said."  You could easily use this to teach how to use different tags for dialog, even having your friends change the ones in the book.  This would be a good book to use with a document camera so your friends can get the full effect.

Right before I was going to publish this post, I thought to do a quick search and see what was out there on it.  I found something wonderful!  Toni Buzzeo has a six-trait writing guide available for free for  ALL of her picture books.  I guess once a teacher, always a teacher!  You can go directly to the download via THIS LINK, or you can get there through Toni Buzzeo's web site.  As I looked over her writing guide, I found that her idea for a convention lesson is exactly what I wrote about, the dialog bubbles!  However, her guide gives you a bunch of other good lesson ideas to use with the book.

I would say One Cool Friend is a must buy.  If your pocketbook allows two, don't forget Exclamation Mark.  Both books would serve you well as teaching tools, but both are also just great books to read and enjoy.

Thursday, February 14, 2013

Writing Conferences in Small Groups

Friends Don't Let Friends Conference Alone!         
 
A while back, I wrote a post about how I have my friends find peer editors during writer's workshop.  I always like my friends to meet with each other and get a peer's perspective.  It benefits both.  However, as the teacher we also conference with our friends.  For a long time, I did this one on one.  I would call a friend who was ready to meet with me to conference on their current writing piece.  Invariably, this would lead to a group of children waiting to meet with me before they could go on.  It just wasn't an effective system.  I had to come up with a better plan. 
 
I started to think about my friends and the different strengths they had.  Friend A was really good at starting with a good hook but would lack details in their writing.  Friend B may be good at adding details, but struggled with a closing.  Friend C had trouble understanding how the order of events of a story was confused but was good at adding details.  I realized I had to get these friends together for conferencing.  Something more than paired peer conferencing.  Something that involved me so that I could identify the area most in need of help and guide a conference in that direction.  That's when I began round table conferencing. 
 
When I am ready to conference with a student, there are usually a few ready to meet with me at the same time.  I call them all to the table and explain that we are going to meet together to help each other make our writing even better.  Usually there are about 4 or 5 students at the table.  I tell them 5 great brains working together will think of ways to make each others papers even more amazing! 
 
We begin with the student sitting to one side of me.  I quickly read over the paper and find the teaching point I want to work on.  I will then ask the author for their input on it.  Then, we turn it over to the group.  Here's an example of how a typical round table conference might go:
 
Me:  John, I read here where the boys went to the park to play soccer.  I'm really having trouble forming a mental image of the setting.  How do you think we can add to your piece to help the reader make a mental image of the park?
 
John:  Ummmmm. . . (Now, this is a fairly easy one but often the author of the piece doesn't know how to fix the teaching point you've picked.  If they do, they will quickly tell you and you can move on.  But, I find that they are usually at a loss and this is how the group helps.  Rather than me telling or heavily hinting at how to fix it, I turn to the group.)
 
Me:  Okay, guys.  John has a great piece here about some boys going to the park, but I'm having some trouble getting a mental image of the park. (Sometimes the author will read aloud the part he/she is having trouble with.)  How can we help John create those mental images of the park in his writing?
 
Friend 1:  He can tell what he park looks like.
 
Friend 2:  He can have the boy talk about the park.
 
Me:  Great ideas.  What would that sound like if I read it?  (At this point, they will start to create sentences that tell what the park looks like.  As they speak, I will quickly jot down key words that they use.  I don't write out exactly what they have said, just key words and/or phrases.  That's important!  Also, once the conversation starts, the author (John) will sometimes have heard enough to be able to also contribute to the conversation.
 
Me: Wow, that was really great thinking.  John, did you hear anything that you liked and think you could include in your paper?  (99% of the time you will get an enthusiastic yes.)
 
At this point I have the author thank the group for their help, and send the student off to revise their paper.  But, they don't go empty handed!  I give them the paper of key words/phrases that I jotted down during the conference to take with them.  Having the key words prompts them in what they need to write.  I haven't given them a transcript of what was said, so they still have to create their own sentences and determine how to fit it in the piece.  But, they have just enough on the paper to support that independent writing back at their desk or writing spot. 


Once that author goes back to their desk, everyone shifts over one chair and we go on to the next author. If another student comes up ready to conference with me, they take the empty seat and we keep going.  It may sound silly to have everyone rotate one seat, but it provides enough controlled movement to keep your most itchy-got-to-move kids interested.  It also signals to the class that a seat is open.  You would be shocked at how they will race to get to that seat.  Despite how it may sound, this whole process is fairly quick.  We just don't have forever to spend with each student. I keep these conferences moving.

 One reason our writing conferencing moves along pretty well is that I am generally focusing on one thing the student needs to revise in some way.  And truthfully, that's about all they should be focused on at that time.  When you overload them with too many fixes, nothing sticks.  They become overwhelmed by all the fixes and just see that their paper isn't good enough.  When you focus on one or two points, it becomes more of a learning experience. 

This probably comes down to what your philosophy is when it comes to writing.  I don't see the value in trying to make each piece of writing a perfect piece each time.  I prefer to hit one or two major issues and use them as teaching points.  Of course, students are expected to edit and peer edit the whole paper to the best of their ability and it has to make sense when we read it, but perfection is not expected by me.  I find that over time, the teaching points we focus on each time carry over to the next writing piece and their writing shows real improvement as we move along the school year.  I'm looking for that progress over time.  So, back to round table writing conferences. . .
 
Here's why I find this type of teacher-student writing conferencing to work so well:
  • Our learning time is so precious we can't have students waiting around to conference with the teacher or doing busy work while they wait.  Having this type of group conference keeps more students actively involved and thinking.
  •  
  • As the teacher, I can pick the teaching point that needs to be addressed.  Although we are conferencing in a group, it is still very much a teacher led conference.
  •  
  • It highlights the strengths of our students. The students who are good at certain things, such as thinking of good hooks, will speak up loud and clear when you go to the group for help.  Each child has a chance to showcase their strengths. 
  • In turn, it supports those students who have an area of need.  The children get to hear their peers come up with ideas that are helpful to them. It means so much more to them when it comes from a peer.  Teachers are always teaching, but when another student does the teaching they listen!
  • If you are taking anecdotal records for writing, this is a great time to get them for a number of students at the same time.  From their responses and contributions to the conversation, you are able to get a lot of informatin on their thinking about the writing craft and how it is done. It's a window for the teacher. Many times I have been delightfully surprised at a contribution given by a student during the group conference. However, I've also been surprised at students that I thought were on the mark with something, but their comments during the conference showed me differently.  Even if you aren't taking notes, it's valuable information to be aware of.
  • It's a great way to teach the writing trait voice in a meaningful way.  My friends have the opportunity to hear their peers writing many, many times.  After a while, I can read a piece aloud and many can tell me who wrote it.  They really get to know each other's writing voices.
  •  
  • It will greatly improve your students peer editing, that time where your students meet one-on-one with each other.  Just by sitting in on the group conferencing, they are learning how to peer edit.  They are learning what an editor looks for when reading a piece.  Think about it.  In your round table conferencing you are modeling editing and revising for them over and over and over again.
  •  
  • I have heard students refer to other students in very positive ways.  I've heard unsolicited compliments given on writing pieces.  I have heard students direct each other to students for specific help saying, "Oh, go ask Anya.  She's really good at . . . "  They know this from our conferencing. 
If you plan to try this type of writing conference, I would have one word of caution.  You really must establish a climate of camaraderie.  That table, that class has to be a safe place to share your writing.  The goal of everyone at the table is to make each other's writing EVEN BETTER.  We are there to help, to critique but not criticise.  Establishing a feeling of teamwork is one of the reasons I have every author thank the table when they leave.  
 
The first few times you do round table conferencing, your friends may be a bit cautious in what they say.  Once they have done it a couple of times and see it is okay to share their writing and to offer ideas and suggestions, I promise it will take off! 

Also, know that this doesn't mean I never conference one-on-one with my friends.  Sometimes they do need to hear just that one knowledgeable voice of the teacher.  But, more often than not I find round table writing conferencing to be the ticket.
 
 ~~~~~~~~~~~~~~~~~
By the way,
HAPPY VALENTINE'S DAY!


Wednesday, August 1, 2012

Life Events Inspire Your Teaching!

I just registered for The Color Run here in New Jersey! 
 I am really just so excited to do this!
One of my goals this year was to make fitness fun.  
If this doesn't do that, I don't know what will!

So, why am I posting about a 5K on my ed blog?  
Because as I was registering I kept thinking,

 "This will be a GREAT writing topic 
to share with my friends!"  

Just the pictures alone are great prompts for creative writing tasks, grammar lessons on adjectives, and so much more.  The pictures above are from The Color Run's website.  I can't wait for this event. Tell me I won't be able to write an awesome personal narrative on this!!  I suggest visiting their site and seeing if there is one near you!

What life events have 
inspired you in the classroom?

Saturday, March 10, 2012

Using WORDLESS Picture Books

We talk a lot about using picture books in our teaching.  I am wondering though if you are using wordless picture books in your lessons.  If not, you are missing out on a great teaching resource.  I try to incorporate wordless picture book in my lessons for a variety of lessons.


Well, besides the fact that a picture is worth a thousand words, there are plenty of other great reasons to incorporate wordless picture books in your teaching:

-They lend themselves to any lesson you could think to teach.
-They level the playing field in the class.  Without text to contend with, you can still teach reading and writing skills/strategies to the whole class or mixed ability groups without needing to level.  This is great for your lower performing students and your ELL friends.  In fact, I find that my high ability students are often the ones that don't so as well with wordless book activities.  They often like to stick to the text and want it to be "right."  With wordless picture books, you have a lot of wiggle room which can make them uncomfortable.  My lower performing students are often able to take the lead in these types of activities.
-It sparks your friends imagination.  Without text, you will be amazed at what they read into what they see.
-You can use the same books across many grade levels depending on what you ask your friends to do with them.  They aren't just for little kids!
-A lot of the ways I use these books require my kids to be up and moving or working on the floor in small, cooperative groups. Anything different from seat work is always welcome! 
-These lessons also often require collaboration, conversation, and decision making as a class. 

I thought I would share with you some of the ways in which I have used wordless picture books in my classroom.  Now, for each of the skills/strategies I list below, I have given an example of how you can teach it.  However, there are a bazillion other ways you could teach these lessons.  These are just some examples.  You could expand the lesson or simplify it as you see fit or maybe you have your own idea on how to do it.  Do what works for you!

Sequencing
-Copy all the pages of your book.  Divide the pages into three parts; beginning, middle, and end.  Give it to three groups.  Each group sequences their pages.  Then, bring the three groups together to decide the sequence of the three sections.  Once they have decided, I tape the pages in order up around the room and we view the story from beginning to end.  As a groups, they can make any last minute changes at this point.  We then read the actual book and see if we sequenced the same way the author did.  This is where the real lesson comes in.  If there were no changes, you can discuss how they determined sequence.  It's important for them to verbally justify their reasoning.  If their sequence doesn't agree with the book, they have to defend their reasoning.  I find that there are times when the sequencing my friends do really does make more sense than what is done in the actual book.  It is in the discussions where I hear how my friends are applying sequencing skills.  This is great for your ELL friends as it puts them on an equal playing field to the rest of the class as there is no text to struggle with, and still teaches them the skill.  Many of the lessons that follow are great for your ELL friends for the same reason.  This is also great for the lower grades if you use a simple book.  They can organize simply for beginning, middle, and end.

Inferencing & Predictions
Without words, you must really analyze the story story through the illustrations.  When reading the book with your friends, have them make predictions before the next page. Without text to cite, they really must apply some good inference reasoning. When you do this as you read the book, they are always in anticipation of turning the page to see if they were correct.

Dialog & Mood
Select a page or two that has two characters.  What would those characters be saying in this situation?  How do I write that dialog?  Using just one page for this makes it a good quick hit for a mini-lesson.  You can then give your friends another page to write the dialog in independent practice.  This is a great way to have them practice crafting power sentences  as it forces them to incorporate mood, which they must determine from what is happening in the illustration.  You can also just use the illustrations to determine mood without having to write the sentences.  In this case, the dconversation you have with your friends is critical.  They need to explain how they determined mood.  What in the picture gave you that idea?  What are the characters doing?  What is the setting?  Did the illustrator use darker, moodier colors or brighter, happier colors?

I find this same technique an excellent way to teach internal monologue.  After reading the book with the class, I focus on a page that comes later in the story.  At this point, there is something going on in the story, some conflict, so my friends have something to work with.  We then focus on one character in the illustration.  I ask my friends what this character might be thinking.  What would his thought bubble say?  We go on to discuss how internal monologue gives us insight to the characters, their feelings, motivations, etc.  and how it can give us additonal information that we may not otherwise know.  My friends then work in pairs to come up with internal monologue for different characters in the book or for the same character in different parts of the book.  Without fail, I find after I do this lesson, my friends begin to incorporate internal monologue in their own writing.

Character Analysis
After reading the book, what do you know about the main character/protagonist?  This really focuses your friends on a characters actions.  Create a list of character traits with your friends.  The lesson comes, again, in having your friends justify their choices.  What makes them say the character is kind or frustrated or loving?  You get the idea!

Narrative Writing
Obviously, there is no text in a wordless picture book.  Have your friends write the story guided by the illustrations.  This is a good way to teach or review narrative writing.  You can write the story on chart paper as a shared writing activity.  This way you can be sure to guide them in incorporating the required narrative elements.  Or, you can always do this as a small group or independent writing assignment.  I like doing it in small groups at the end of the narrative writing unit.  I can see my friends applying what we have learned.  Also, it is really a lot of fun when we read the stories from the different groups.  While we all had the same illustrations to follow, the stories are always different.  The plots vary, some go for humor while other groups are more serious.  Some groups embellish beyond the pictures, while others pretty much stick to the pictures.

Identify Plot Structure, Story Climax
For this, I usually have my friends sequence the story first. Then, we discuss the story plot.  Once we know what is happening in the story, my friends identify the story page that shows the climax of the story.  We can then look at the pages before and after.  If you have taped your story along the wall as we do, you can then move the pictures to show the plot mountain. 

When you tape the pictures in a visual display on the wall, they can then use sentence strips to label the exposition, rising action, climax, falling action, and resolution.  It is a very concrete, visual way to teach these elements.

Main Idea & Supporting Detail
If you've done either the sequencing or plot structure lessons above where you ordered the pages on the wall, you should try this lesson.  Have your friends identify the page that essentially shows the maid idea.  Once you are all in agreement, have them take down any pictures that don't support that main idea.  You will be left with only pages that show events which support the main idea.  Again, a very visual and concrete way to teach this skill.  I would chart this with words.  Write the main idea and then, looking at the pages, come up with a sentence for each supporting detail.  I would also just suggest being particular about what book you use.  Some wordless picture books tend to be very fanciful and imaginative.  This works best with a book that follows a less imaginative, "real" story.

Those are just some ideas for lessons you can teach with wordless picture books. Depending on your learning goal and what you require of your friends, I find them to be excellent books to use across all grade levels. In particular, your older students will really get a kick out of using them because it is so different from their norm.

So, let's talk books.  Wordless picture books can be hard to find if you don't know what you are looking for.  In my public library, the wordless picture books are mixed in with all the other picture books.  You could spend forever looking for one without words.  With a simple Google search, I was able to find a few different lists.  Below are two links I think might be helpful in getting you started.   I selected these list because they both have books I have used with great success.  I'll tell you a little more about two of my favorites that are on the lists.

  • The Louisville Free Public Library also has an online list.  A few of the books on their list are the same as on the Carnegie list, but there are some different ones.  One I like and have used is You Can't Take a Balloon into the Metropolitan Museum by Jacqueline Weitzman.  Being just a quick train ride away from New York City, my friends can always make connections to this book as many have been to large museums in the city.  What I really like about this book is that there are multiple illustrations on each page.  There is usually a larger, main illustration with smaller ones around it.  It is like having supporting details on the page for the main picture and is very helpful for your students that need more information or visual clues.

Between these lists, you should have a good starting point.  There are a lot of great wordless books out there, and these are just a small sample.  There are so many others I could go on about.  Talk to your school media specialist, and see what they recommend.  It would be nice if they had a special section just for these types of books.  However, don't be discouraged if you can't get your hands on any wordless picture books or don't have the time to go looking. It is easily solved. Grab your favorite picture book and some Post-It notes. Simply cut the Post-Its to cover up the text. Voila! You can turn any picture book into a wordless picture book.

So, is any of this helpful or have I just rambled on?  :-)  How are you using wordless picture books?  Do you have a favorite to share?

Friday, March 2, 2012

Peer Editing


I promise this mess means something!

How do you select peer editors for your friends?  I always have some that are ready for a peer editor and some that are still writing.  It got to be confusing to see who was ready for peer editing and who wasn't.  Then, I came up with this idea.

When we are ready for editing, my friends get a checklist to use for self-editing.  It's pretty thorough and my friends are able to catch and fix a lot.  However, I always like them to have a peer editor.  A fresh set of eyes will always find something new, and it gives my friends an opportunity to see how their peers are writing.

When I see that my friends are beginning to be ready for a peer editor, I make the chart above.  I write "I need a peer editor!" at the top and number one to about 15.  When a friend is ready for a peer editor, they go up and write their name down.  If they get to the chart and see a name on it, they write their name next to it and then cross out both names with a single line.  They then, meet with their peer editor and exchange papers.

Here's why this works for me:
-It's a random pairing.  In the past, I would try to make sure they had a different peer editor each time. This chart sort of takes care of that.  They rarely get the same person twice.
-When they just put a single line through both names, I am able to see at a glance who is working together.  Of course, for the blog I have scribbled out the names. 
-They know the routine.  My friends always have  what we call a "Go To" book and activity in their desk.  If they put their name on the chart, but a peer isn't yet available they go to their "Go To" book and read or work on their "Go To" activity while they are waiting.  There is always something to do!

I have also simplified my peer editing process tremendously.  In the past, I would copy different peer editing checklists for my friend to use.  It got to be far too complex and time consuming.  Now, we don't use a chart at all.  They simply take a blank piece of paper.  The rule is two compliments and two critiques. 

We work it this way.  They meet with their peer editor and exchange papers.  They then find a spot away from the author to read the paper.  They can't ask the author any questions while they peer edit.  I point out that they are not able to ask the author of the books they read any questions as they read. The piece has to be able to stand on its own.  This is where the compliments and critiques come in.

They have to give two SPECIFIC compliments about the paper.  They also have to give two SPECIFIC critiques.   They write out these compliments and critiques on the blank paper.  Now, I will say this works best when you do a mini-lesson or two modeling how it is done well.  When they first start peer editing, they are very general.  The compliments and critiques are not really helpful to the author.  You really need to model how to make specific comments that will guide the author in some way.

Once they are done, they meet up with the other author and they conference together to discuss what they each wrote.  Then, it is up to the author to decide if he/she want to make any changes based on what their peer editor said.  I tell them that they are the owner of their writing.  They may choose to make changes or it's possible they don't agree with what the peer editor noted.  In that case, they simply say thank you for reading my paper and don't make the changes.  I feel it is important for them to have ownership of their paper.

The best part of this is that it all happens without me!  From the time they write their name on the chart to the time they finish meeting with their peer editor, I am out of the equation.  This allows me to focus on the kids who are still in the earlier stages of the writing process and need conferencing with me.  It really works well for us all.  My friends are headed to middle school the next year, so this also helps build the independence they will need.

How do you conduct peer editing with your friends?

Wednesday, February 22, 2012

THE BEST Writing Book!

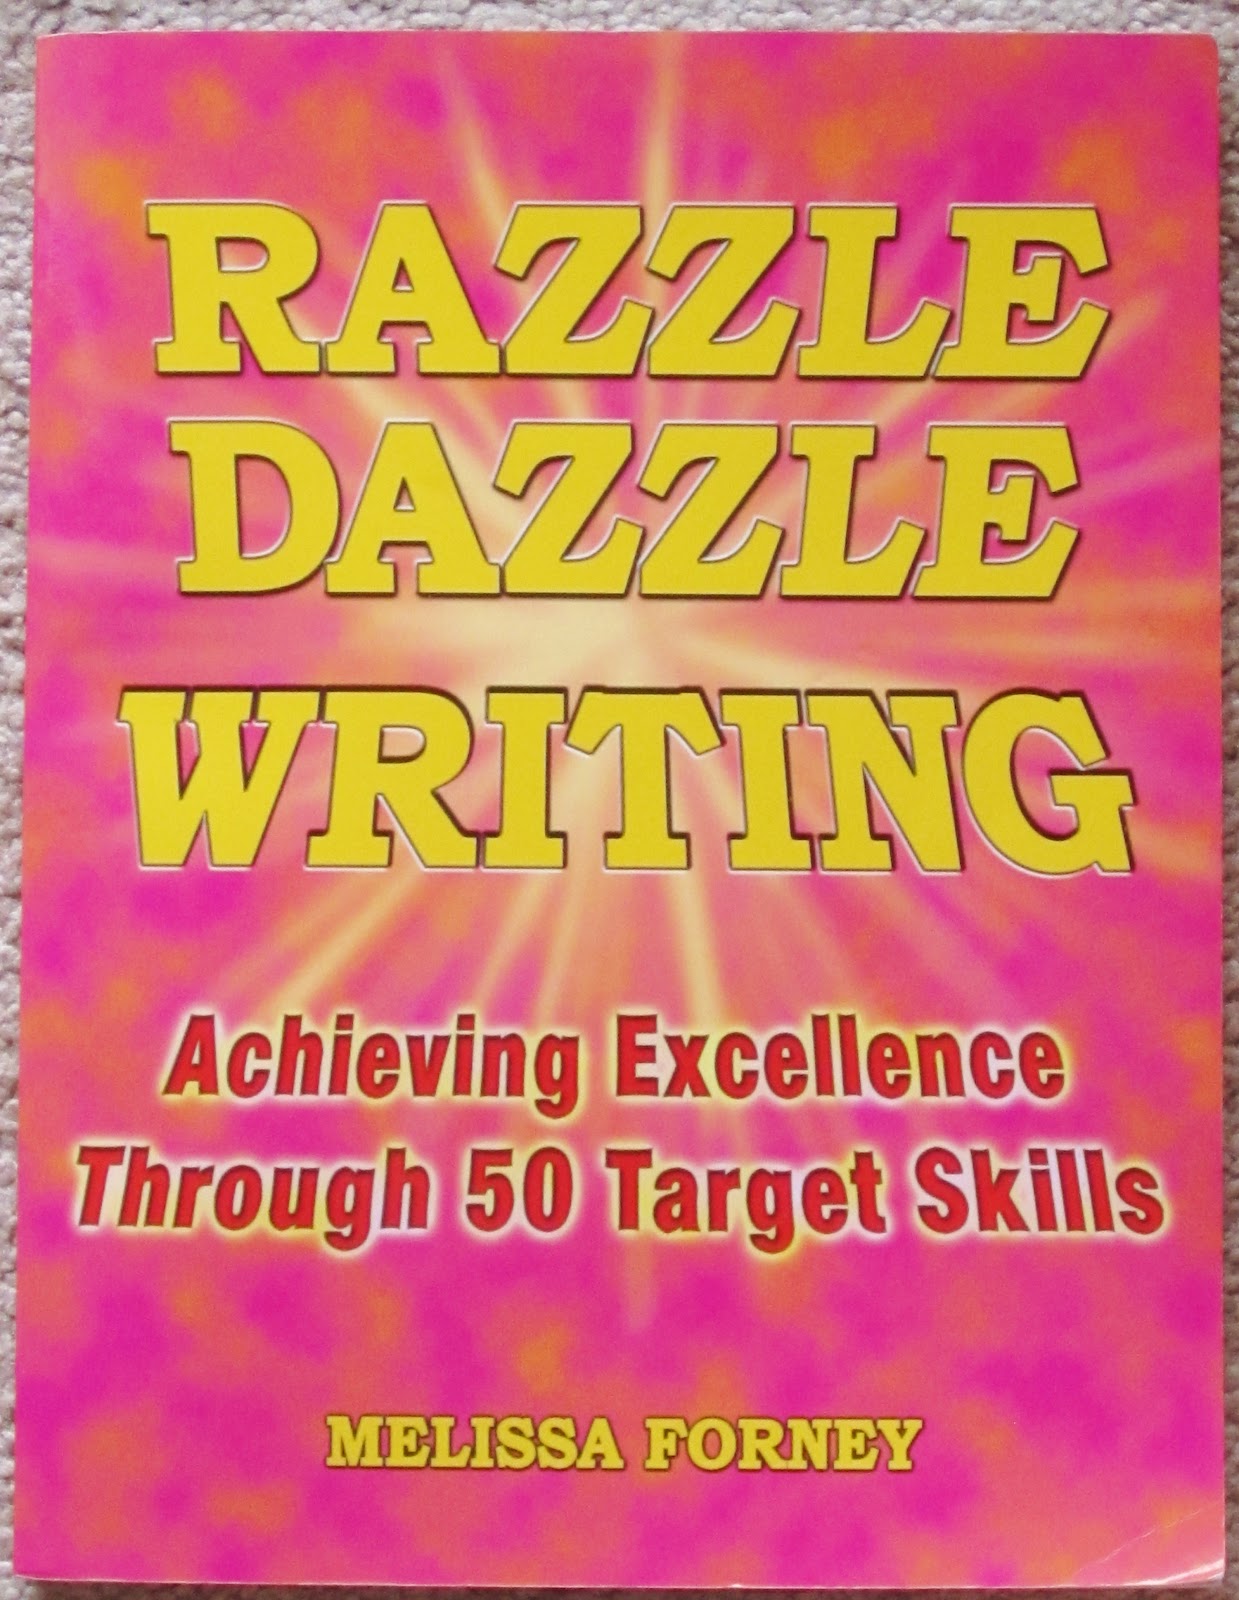
I was talking about this book with a colleague the other day.  More like singing its praises.  It was then that I thought I needed to share this resource with my blog friends.  If you teach intermediate grade writers, YOU WANT THIS BOOK!  The title of this gem is Razzle Dazzle Writing: Achieving Excellence Through 50 Target Skills by Melissa Forney.

I love this book!  It is so on-target with the skills it covers and so appropriate for intermediate grade writers.  This book is perfect for 3rd grade through middle school.  If I don't tell you another thing about it, you should just go buy the book because it is selling on Amazon.com for a very cheap $13.57!  Honestly, I would quickly pay at least twice that for this book without blinking.  Ms. Forney also has a sister book for the K-2 set called Primary Pizzazz Writing.  I haven't seen it in person, but it looks like a winner.

The pages of Razzle Dazzle Writing are meant to be copied for your friends and used as a teaching and reference tool.  Here is a checklist from the book that notes the 50 skills covered:

As you can see, the topic lend themselves to your everyday teaching throughout the year. However, this book is also great for test prep.  Ugghhhh!  I hate to even utter those words, but they are a fact of life for us these days. Let me be clear though that Ms. Forney is very clear in the book that it's not all about the writing prompt.  She does state that our friends need to know the difference between prompted writing and free writing.  I also believe this.  As much as we would like our friends to embrace writing and freely write as they are inspired, the reality is when the state test comes they are going to be directed via a prompt to do a very specific type of writing.   I used the mini lessons in this book to create an anchor chart on understanding the different types of prompts:

 And, here is another chart I created using one of Melissa Forney's lessons on using a "writing glove" to help your friends properly address narrative prompts.

Sigh!  Just noticed that I spelled dilemma incorrectly on the chart.  Will be fixing that in class ASAP.  Sorry about that!
Ms. Forney has great ideas for this mini lesson.  The book even includes reproducible gloves for your friends to cut out and put on a stick.  The creation of these two anchor charts is directly inspired, if not copied, right from Razzle Dazzle Writing.  I tweaked a bit for my friends, but the book is so well put together you can essentially photocopy what you need and do your lesson with minimal prep.

Razzle Dazzle Writing includes tons of pages you can copy for your friends to keep as reference, there are also poems and reader's theater scripts that are included to reinforce many of the lessons.  The poems are fun and easily understandable for your friends.  The reader's theater scripts get right to the point in a fun way , yet they are short enough to be done as part of a mini lesson.  I have yet to find anything in this book that isn't a perfect fit for my friends.

Melissa Forney has an incredible web site where you can learn more about her books and philosophy.  Click HERE to be taken to Forney Educational, Inc.   There are also free downloads available on the site.  THIS PDF DOWNLOAD is for a booklet titled Young Writer's Survival Guide.  It is an excellent resource for your friends.  Many of the topics in this guide are topics covered in more depth as different mini lessons in Razzle Dazzle Writing.  That PDF alone should convince you to buy the book!

So, have I gushed enough?  I hope so!  This is not a paid endorsement.  This is a post on a book that I find myself going back to again and again and think you will, too.  If you know this book, please share your thoughts.  If you end up getting this book, let us know how you like it.

On a totally different topic, every time I think of the name of this book, it makes me think of this scene from the movie Stripes with Bill Murray.  I know, totally dating myself yet again!

Also, don't forget to enter my giveaway to win a copy of Testing Miss Malarkey and assorted other goodies!