Showing posts with label Reader's Workshop. Show all posts

Thursday, October 10, 2013

Check Marks to "Stop and Check-In"

Me:  You just read this page.  Can you tell me a little about what you know?
Student: Ummmmm. . . . (Insert wait time here.)
Me:  I know you were really interested in reading this book when you chose it.  Who did you read about on this page?
(Insert more wait time.)
Student:  A boy? (Yes, answered as a question.)
Me:  Hmmm, can you tell me a bit about the boy? What was he doing?
Student: Ummmmm. . . . 
(Insert lots more wait time here to be followed by 
major prompting that led to more answers phrased as questions.)

And, this would be why we revisited the "Stop and Check-In" strategy yet again! I find that my friends (reluctant readers) have a habit of reading straight through without really stopping to check comprehension. This led me back to revisiting the Stop and Check-In strategy.  

It is always amusing to me that I really have to explain why this strategy is so important for reading. In explaining it, I try to find a way to make it relatable to them so it isn't just another thing a teacher tells them they should do when reading.  I asked my friends to imagine that they had broken their favorite game system. They take it to be repaired, but the two repairmen have never fixed one before.  So, they promise they will read up on it and learn how to fix it.  One repair man reads the book but doesn't really understand what he's reading.  He decides to just keep reading and hope he understands at the end.  The other repair man stops every couple of pages to make sure he understands what he read.  Only when he thinks he understands does he keep reading.  The next day, both offer to fix your game system.  Who do you want to fix it?

Without fail, every single student wants the man who stopped and checked-in while he was reading to fix their game system.  When I ask why they tell me all the wonderful reasons that make this strategy so helpful to them  He will remember what he read.  He understands what he read, so he will know how to fix it better.  The other guy will mess it up because he didn't understand anything.  From there, it is so easy for them to connect how this same strategy helps them as readers and test takers. I sort of hate that I have to even mention the latter, but it seems to be our reality these days.

To make the strategy more concrete, I made check marks using two basic questions as found in The Cafe BookWho did I just read about? What just happened? Two short and sweet basic questions that force them to self-monitor and check for comprehension. Here's a link to their Ready Reference Form that explains the strategy in-depth. 

The Cafe sisters had a parent make balsa wood check marks, but seriously? How many of us can do that?!! I don't think I would even want that.  Mine were made using clip art and text boxes.  I just printed them on card stock and laminated them.  The laminating turned out to be especially important.  One of my poor friends has been a sneezing, snuffling, nose-drippy mess all week and my check mark was certainly not spared! I actually took the laminated check mark to the bathroom to wash before using it with the next group! Here's to hoping my little friend is feeling better soon. 

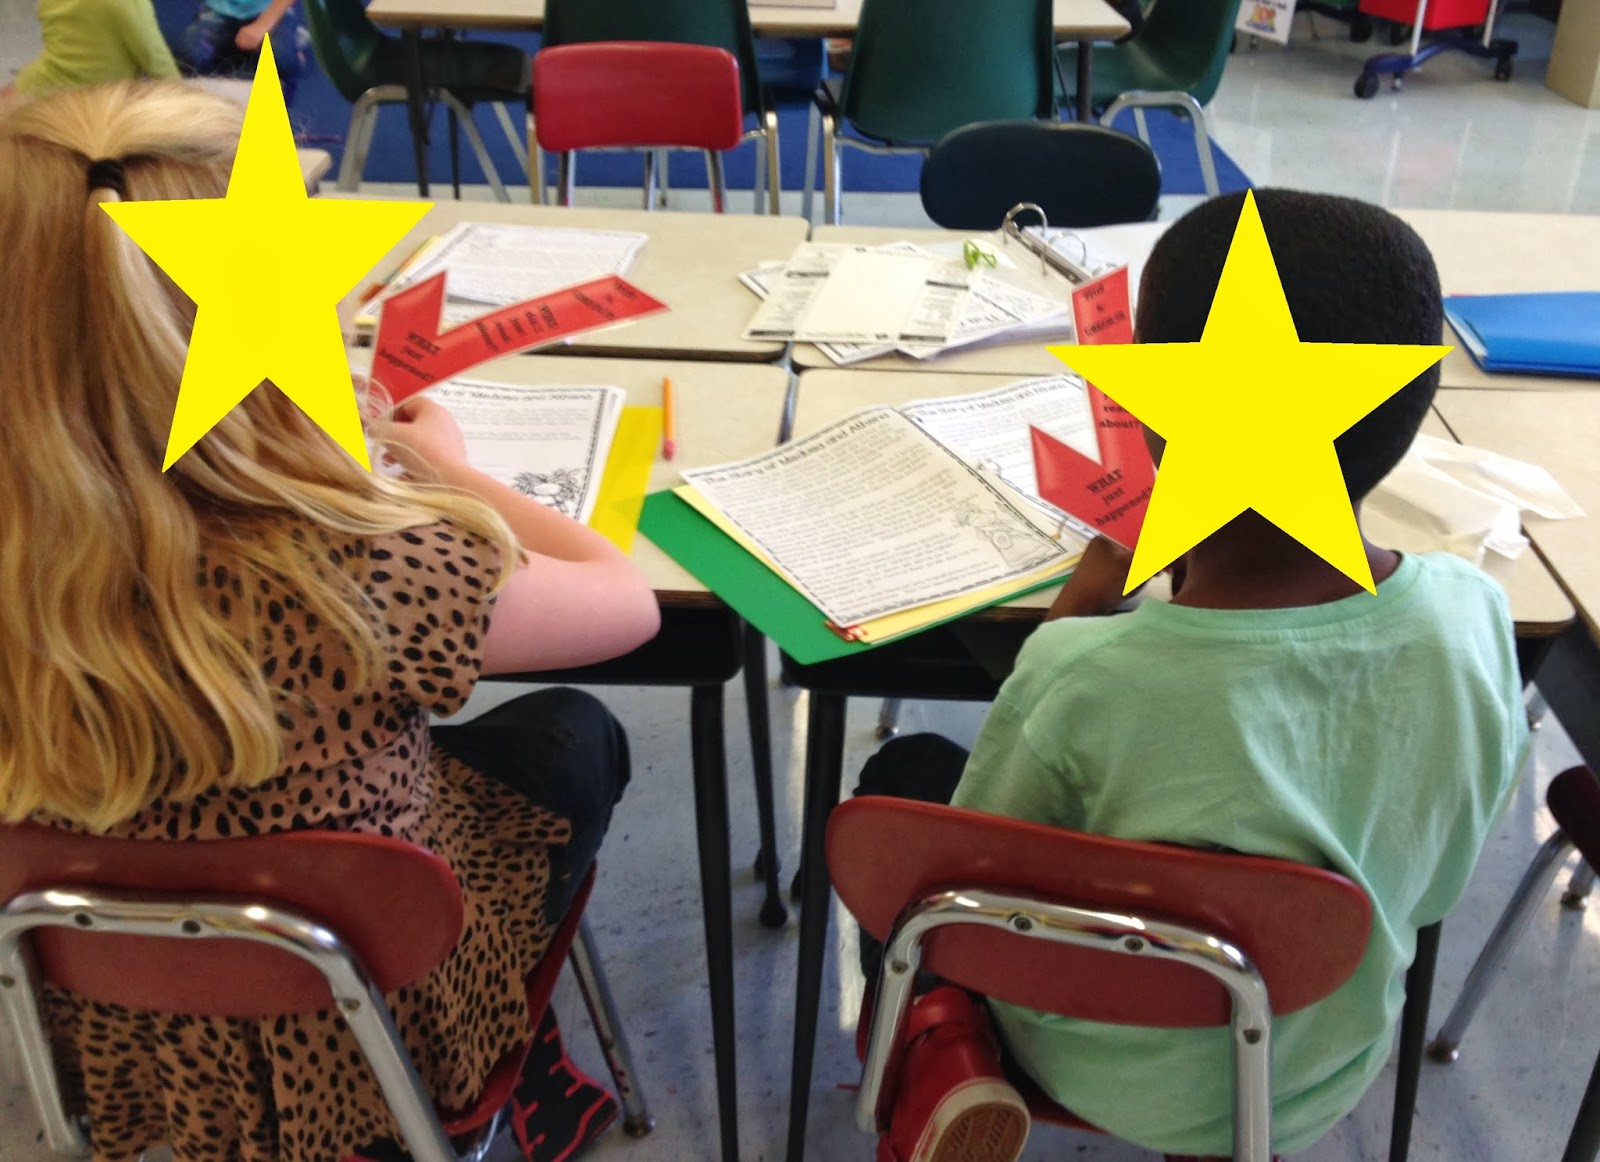
I modeled the strategy with a friend first.  Then, when it came time to practice, we used one of our reading selections in which we marked stopping points.  Then, I paired up each student.  Student A read aloud to student B.  When they reached the stopping point, student B would hold up their check mark and say, "Stop and Check-In!"  Student A would then briefly retell by answering those two questions.  Student B had to listen to make sure student A didn't leave anything important out or misinterpret what was read. If that happened, they helped out. They would then switch roles for the next section of text.

I'm well aware that I'm not sharing anything new here. Many others have blogged about it before this. The strategy has certainly been around forever, but it is well worth mentioning as it is so very effective.  I think that the physical action of holding up the check mark and saying, "Stop and Check-In!" aloud was especially helpful to my friends.  It helped to cement the idea in their minds. 


We then used the strategy independently the next day with their independent reading books which had sticky notes placed at strategic stopping points.  They did a quick jot on the sticky to stop and check-in when they got to that point.  A quick and easy way to assess how well they are using the strategy.

Unfortunately I can't share the bookmark I made because it wasn't until after I made, printed, and laminated them that I saw the check mark had a very, very, very faint watermark.  But, I did search for some that you might like.
If none of these work for you, it really couldn't be easier to make your own. You could even draw one on card stock using colored Sharpies.  Quick and easy!


Sunday, September 8, 2013

Reading Response Form Letters for Upper Elementary Students: Beginner Level

Recently, I received this email from a reader:
Hi there, I have been following your blog for quite sometime and would like to ask a quick question of you.  I have been using reading response notebooks/letters with my 5th graders for 8 years now and am still struggling with what is the best accommodation for my inclusion special education students.  I have 5 students this year with limited writing abilities. Do you use a cloze template for them to fill in?  If so, so you have an example one?  We have used verbal response, a scribe, cloze paragraphs, shortened response, etc. and I'm still wanting something a little bit different.  Thanks for your help and hope your school year is going well.    
There was a huge response to my posts back in 2011 on how I did my reading response letters back then. I had posted explaining how I set up my reading notebooks. I also did two separate posts on how I modeled writing a reading response letter, here and here.  At the time, I was working with enrichment students who had no difficulty in writing those letters.  Currently, I work primarily with students who sometimes have significant difficulty in writing even the most basic of response letters. While they aren't special education students, I completely understand the situation that email stems from!
Thesis Statement

As I worked more and more with my new students, I could see that they definitely needed more support in writing the letters.  As I noted, they weren't inclusion special education students, but there were still  many for whom the task was just too overwhelming. Cognitively, it was too much to put together.  There was deciding what to write about, then connecting that writing topic to selected information from the book to include in the letter.  There was getting all that thought together, and then putting it all in the specific format of a friendly letter.  For children who are struggling readers and writers, this is a tremendous task.

To help those students, I created a number of reading response form letters that address some different thinking stems (comprehension strategies.)  There is nothing cutesy about these letters.  I didn't put in borders, clip art, or use fancy fonts.  It's a basic form letter to fill in.  There's a reason for this.  My goal is that eventually my students are able to take a plain piece of lined paper and generate a letter on their own. I want my form letter to look very much the way the letter will eventually look in their notebook or lined paper. I also wanted nothing visually distracting.  I am focused on the content, and since I'm asking them to write in letter form, providing the format.  Content is exactly what my plain form letters focus on and modeling the format provides familiarity with it as they use the forms.


There are 13 letters in all that focus on setting, character, plot, making connections, asking questions, visualizing, inferring, predicting, plot, summarizing, synthesizing, an open response for fiction and non-fiction.
You can download the letters by clicking HERE.   It is a PDF that I uploaded in to Google Docs.  There shouldn't be any problems downloading them, but I know there are always a few people who have some trouble with it. For that, I apologize.  I would love to trouble shoot that for you, but my tech skills are just not that advanced! :-)

These letters are meant to be a tool in helping our students transition to writing independently.  However, there are students that will need extended time using these letter forms.  There are students that will need these types of forms for most of the year, if not all year.  That's okay!  It depends on the child's needs.

Now, let me tell you why you may not want to use the letters at all!

I do want to note that I strongly suggest not getting caught up in letter writing as your only form of reading response.  For upper elementary students, I like it because it is a way to organize their thoughts in a form (paragraphing) that will be necessary if not required as they head to middle school. But never forget that the content is of primary importance.

If you have a student that simply can't master using friendly letter format independently no matter how many times you show them or they practice using it, stop requiring it of that student.  At least for a while.  After all, you are asking for these responses to see if students are effectively applying reading strategies, if they are monitoring for comprehension, if they are extending their thinking. Think about what the goal is here.  It's not to see if they can write a friendly letter.  When the letter just isn't working, we may need to start providing variety in their reading response opportunities.

We've often been told our students need to be writing reading response LETTERS.  And, hopefully if you are doing that these form letters are helpful to you.  But, what they should be telling us is that students need to respond to their reading.  That response can and should take many forms and be as varied as your students' needs. Some alternate responses to a letter format response include:
  • Conferencing - A conference discussing the book where a teacher takes anecdotal notes can be very useful for students who simply have difficulty getting the hand to write what he brain knows!
  • Graphic Organizers - Some students need the visual organization a graphic organizer provides.  They also often allow a student who is limited in writing stamina to give specific, succinct answers in each section.
  • Identify Key Words - There are a few ways to do this. Here are two examples.  One way could be, if you are looking for the student to respond with character analysis, to jot down three or four character traits on a piece of paper.  Have the student circle one and at the bottom of the page explain why they chose that trait.  Of course, you want them to explain what in the text makes them choose that word.  The support comes in that you have provided the possible character traits.  Another way to do it for non-fiction is to jot down a few words related to the topic.  Have the student choose the word that is most important to the book and tell why.  This is definitely higher level thinking.  We aren't trying to get away from higher level thinking, but instead looking for other ways to show it beyond a reading letter.
  • Sketching - Have the student sketch the most important scene and explain what is happening and why it was important.  Or, have them sketch and label the character.  They can label with three things we can see and three things we know but can't see.   Notice I said sketch, not draw.  It is not meant to be an art project but a reading response.  A quick sketch should do the trick!   
  • Record It - Write some general, key comprehension questions on index cards.  Give one or two to a student and have them record their answers verbally.  Hopefully, most schools have simple microphones for the classroom computer that make this easy to do.  
Those are just a few ideas.  Some are easy, and some require a bit more work.  But, what they all do is provide alternate response choices that might better fit the needs and abilities of certain students.  One of the most important things we can remember as teachers is that; 

Fair isn't everyone getting (or doing) the same thing, 
but everyone getting what they need to succeed.  

Reading response letters are just one way of doing it. So, please keep that in mind as you use these letters or if you go back  to my previous posts and follow my reader's notebook letter format.

By the way, if not using the form letters for a weekly reading response letter, throwing some in a folder can make a quick and easy literacy center.  I've also found them useful in my guided reading groups where time is so limited. If you decide to use them, please take a minute to comment and let us all know how.  You never know when your idea may be exactly just what someone else was looking for!


Tuesday, August 27, 2013

READ in the Hall

On Monday, I finally started on my classroom.  It's been a project because 80% of everything I have was in a box.  This year, I am only going to be teaching literacy.  That means two things:

  1. You won't be seeing a lot of math posts this year! 
  2. My entire classroom from decoration, instruction, to function is focused on reading. 
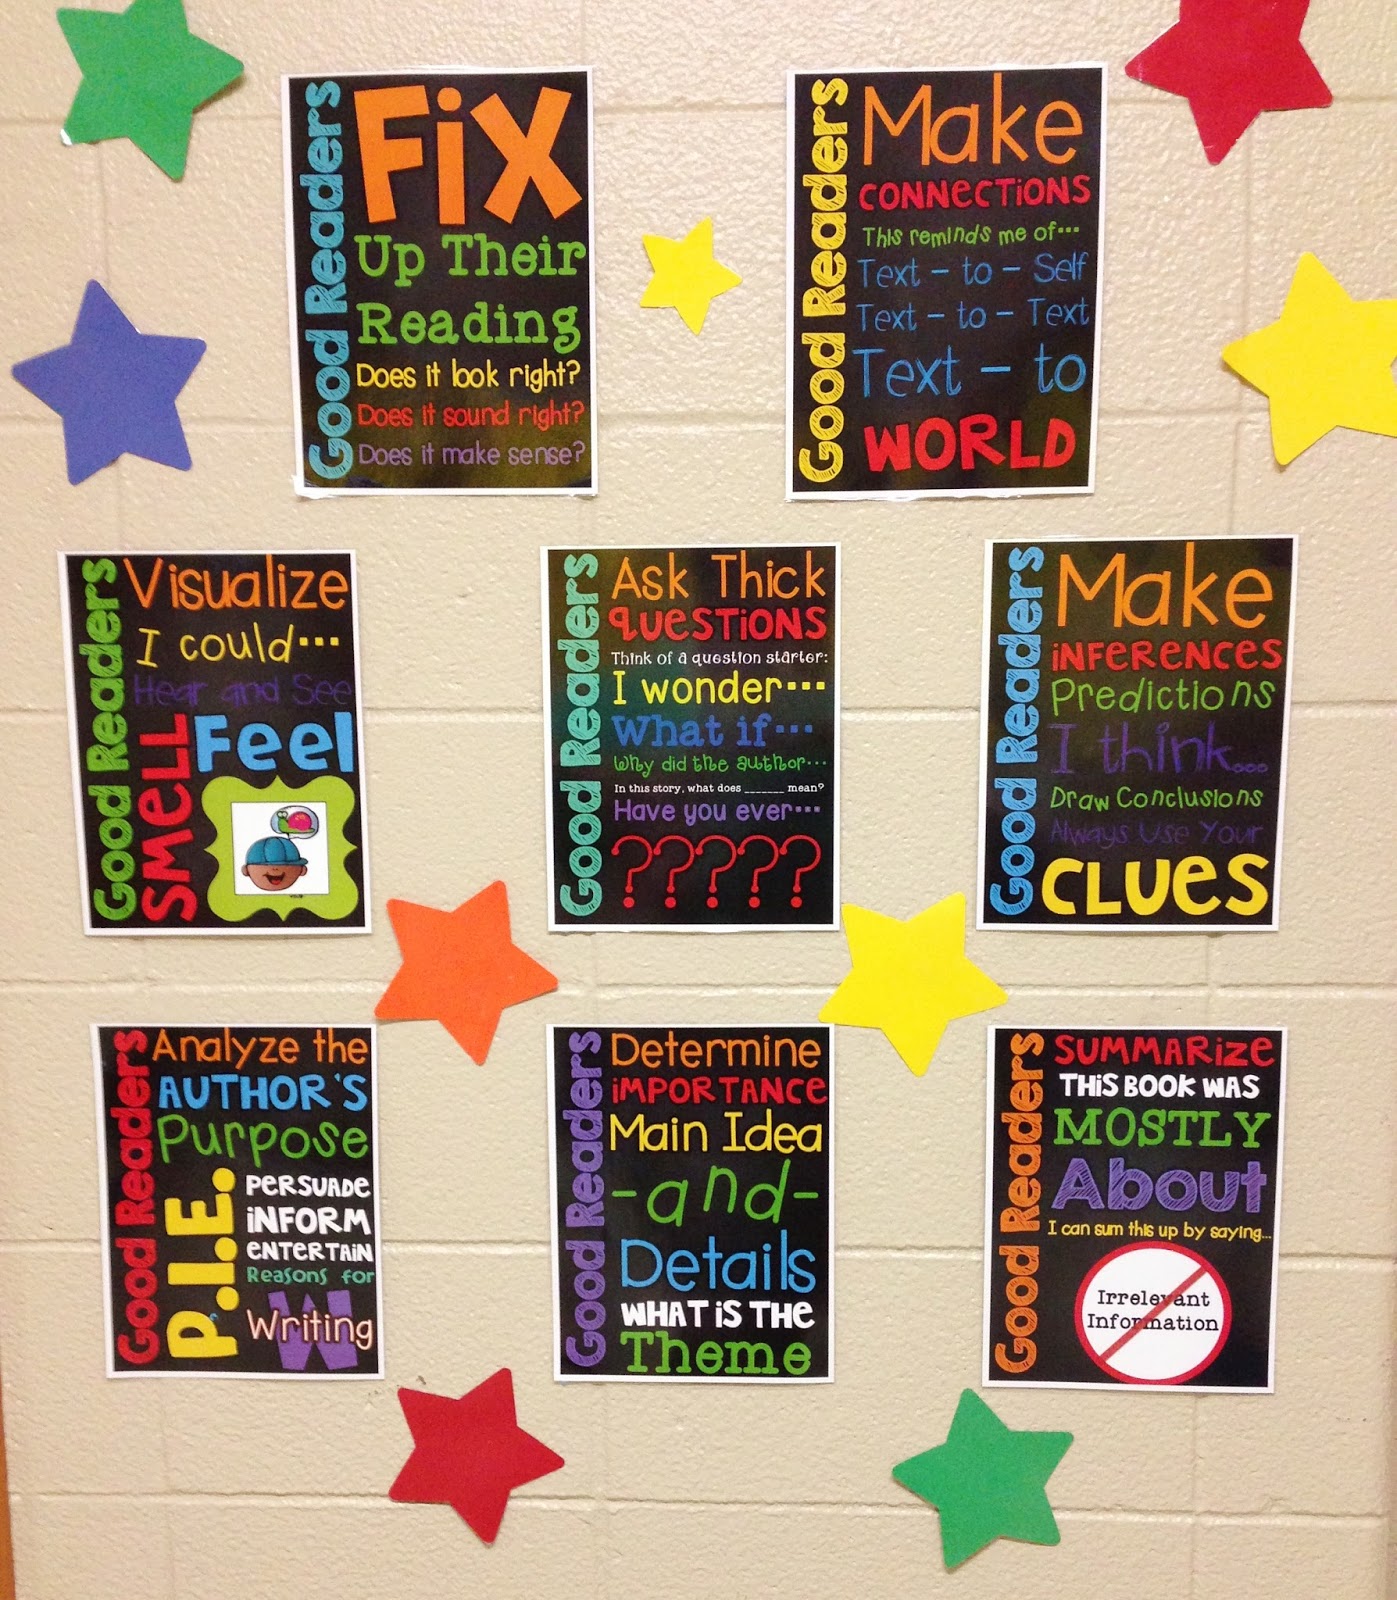
 Every corner of my room relates to reading in some manner.  This includes the area outside my door.  Every year, I like to put something out there that can stay up all year.  I found these "Good Readers" posters and loved the content and color theme.  My room is all bright colors (a little too bright maybe, but I will explain that in a post to come) and these posters fit right in with what I'm teaching, my room colors, and have content all kids need to be reminded of.

 These reading strategies subway art posters are by Hope King.  They were exactly what I was looking for!  If you get them, I would suggest taking them to Staples or Office Max to print.  All that black ink would wreck havoc with your home printer.  I also find that anything I have printed at Staples is much more vibrant than anything my dinky little printer can produce.  After printing, I just laminated them.  Easy peasy!


Once I had the posters, I needed something to pull it together.  I made these READ letters to match the posters.  I think it goes together really well.  The lined letters match the "Good Readers" letters on the posters. I was going to put them up as a download for you, but I realized I used a font that was for personal use only.  If I get a chance, I will try to redo them with a font I can publish for you.


In the past, I have decorated the outside of my room several different ways.  I was able to find the past two years buried in my blog.  That's one of the things I like about blogging. It keeps a great record of things I've done in the past, for better or worse!

In 2011, I had a simple sign that actually fits in with this year's color scheme.

In 2012, I went with some motivational signs.

And for 2013, we READ!

If you look closely in the picture above, you can see just a couple of the many, many boxes I have been unpacking the past two days.  I don't dare show you the inside of my room just yet!  However, in my next post I am going to share a project I found via an Instagram picture that I knew I just had to do for my room.  
Stay tuned!


Saturday, August 17, 2013

Author's Chair ~ Share Chair

Many years ago, I spent a lot of time making an author's chair.  If you aren't sure what an author's chair is, it is "just" (Not really "just," but there's more on that at the end of the post) a fancy chair your author-students sit in when reading their work to the class.  Somehow, one year, my chair disappeared from my room.  I'm pretty sure it was probably broken misplaced one summer during the room cleanings.  Lately, I've been toying with the idea of creating a new author's chair.  While the summer has flown by, I've not abandoned the idea.
I have an old, wooden chair like the one above that would be perfect for the project.  In fact, I turned to Pinterest for some inspiration and was so amazed at how creative my fellow teachers are that I decided to share some of it here.  The pictures are from the teachers' blogs or their Pinterest boards, and I have tried to link directly to each.  However, some of the pictures had no blog or site linked to them. The just linked back to the image.  If you know who a chair belongs to, please leave a comment and I will happily add the link to the teacher's blog, Pinterest board, or web page.

Let's begin with some . . .

Author's Chairs!

Lauren is not a blogger, but a pinner!  She pinned her author's chair on her Pinterest board: My Creations. Instead of a standard chair, she used a director's chair.

Angie Austin is an artist that paints author's chairs for teachers.  Below is one featured on her blog.  If you visit her blog, you can see some others she has designed.

Stephanie Mellon painted this chair for her classroom.  She doesn't seem to have a blog, but posted her picture on her Pinterest board. Her chair is amazing!  Her picture collage below shows you the many steps involved in this project.

Here's  another great chair from Pinterest that only links back to the image.  I love the pencils painted across the back.

Here's another amazing chair that links back to an image.  This chair looks like it took a lot of time, effort, and love of teaching!

The chair below is painted by Priscilla Zachary for her school teacher daughter.  As far as I can tell, Priscilla also doesn't have a blog, but posted her picture on her Pinterest board that you can see here. Priscilla is very talented as evidenced by this amazing paint job!

This picture also links to the image on Pinterest, but I had to include it for its simplicity.  If you don't have time to paint a chair, simply grab some ribbons, a chair cushion, and some Sharpies.  No painting needed.  Also, this chair could fold up for easy storage when not in use.

Share Chairs!
Share chairs are nice because they aren't limited to author's use only.  
You can use a share chair for any kind of presentation.

Heather, from Fifth Grade Frenzy has created a super snazzy share chair. I like this chair because it fits in with my room's color theme this year.

Ms. K at Teacher Blog Spot shares a genius idea for a quick, cheap, and easy share chair a teacher in her building came up with.  All you need is a plastic lawn chair and some stickers.  Imagine how cute this would be with a lawn chair in a cute color and some themed stickers.

Stools!
Who needs an actual chair? Stools takes up less space and need less paint!

Amanda at First Time for Everything has added some fun pom-pom trim to her stool.

Beth, the Inspired Writing Teacher, has this very colorful stool as an author's chair. If you follow the link to her blog, you will see that she also has an actual author's chair, too.


Here's another colorful stool posted by Kelly on her Pinterest board that is used as an author's chair.

All Purpose Celebration Chairs!
An all purpose celebration chair is more of what I had in mind for my classroom.  I like a chair that you can do an author's celebration in as well as be a reward chair to sit in for good behavior or birthdays.  

Hope at 2nd Grade Shenanigans made a most amazing chair.  Love the feathers!  You can hardly tell, but the chair is a basic wooden school chair.  Hope shows you the before and after in her blog post. I love her blog! 

Debbie Clement is an author/illustrator who visits schools.  She took the picture of the chair below on one of her visits and posted it on her blog, Rainbows Within Reach. Imagine the possibilities with a chair labeled Imagine!

Here's a really fun chair for those not into painting. Mel D. at Seusstastic Classroom Inspirations made this awesome celebration chair using tissue paper, old Dr. Seuss books, and Mod Podge. Love it!

And, Finally. . . 
How about a reading BENCH?
I love how so many favorite books have been incorporated in the paining.  I also love all the books laying on the seat.  I'm not sure I'm talented enough to pull off something like this!  Again, this is a picture that only links back to an image, but I would love to know who created this gem.

Here's an amazing idea!  The Ethelbert B. Crawford Library in Monticello, New York had children paint reading chairs and auctioned them off.  If you follow THIS LINK, you can see several of the chairs the kids created.  The library was able to raise $1300!  If your school has some older chairs, wouldn't that be a great art/literacy project?  Instead of auctioning them off, they could be great additions to the school's media center or front office.

There's more to the author's chair than "just" a presentation seat.  When an author is in the chair, it is a time for the reader author to practice public speaking, fluency, and prosody. There is also the joy they get from seeing the power of their words.  I will always remember a time a friend was reading a story to the rest of our class that had a very funny moment in it.  When he read that part, the entire class laughed so much that he had to pause in his reading.  When he was done, I pointed out to him (and the class) that his written words had the power to make an entire group of children laugh for quite a while.  His words made people experience joy.  I told him, and the class, that THAT IS THE POWER OF AN AUTHOR!  The look on his face was priceless.  He really hadn't understood until that moment that words have power and as the author, he wields that power.

For listeners, it is a time to practice active listening skills and social skills for audience behavior.  Often, during author's celebrations, the class is asked to respond to the author with one specific compliment and a question.  You can't do that if you aren't actively listening!

If you are new to using an author's chair or just want some ideas on how to make it more meaningful,
here are a couple of resources that might help:

  • Click here to see how Teacher Vision has outlined exactly what an author's chair is and how to use one.
  • The Oakland Unified School District,  via their Writing Proficiency Project, has a nice printable of tips for making your authors' chair a successful experience for all.  Click here for the pdf.
   In addition to showing some great chairs, the links will take you to some great blogs to explore.
Hopefully, you have found some chair inspiration! 


Wednesday, January 25, 2012

A Bit of a FACElift!

Well, I thought I was closer to finishing my room than it turns out I really am!   Did you ever look at pictures taken in your home and start to notice all these different things that you don't notice in real life?  That's what happened as I took some pictures of my classroom for my "after" blog post.  I started to notice all these little things that I still need to take care of, so the after blog post is on hold for a bit.   The whole room reveal will be coming soon.  Gee, that makes it sound much more exciting than it really will be!

But!  In the meantime, I am going to share a picture of the new spot I put my FACE board.  I first showed you my FACE board in this post.  It's the board where I post a quick summary or reminder for my friends of the mini lesson we completed.  I still get a lot of questions about this board from blog land and even a few teachers in my own building.  Because of that, I thought I would share how it has evolved since the beginning of the year.  Here it is in its new spot:
In the process of moving the room around, the FACES board ended up on a closet next to my meeting table.   Oh, here's a sneak peak of that table for you.  The meeting table that I was worried was going to be way too yellow?  Yeah, it's really yellow!

But, I love it!  Now, back to FACES.  I still use the board in much the same way I noted in that earlier post.  After a mini lesson, we put up a one or two sentence summary of what we learned.  The board is now, as before, next to my meeting table and it comes in handy.  I often have my friends refer to it when we are working in our guided reading groups.  Here are some of the different cards we've put up so far:

FLUENCY

ACCURACY

COMPREHENSION
EXPAND VOCABULARY
-Voracious reading got cut off!
I think you can see some of our nonfiction lessons making their way on to the board.  I do still wonder about it sometimes.  I know that from a distance, the cards are hard to read.  If you look at the first picture above, you can see what I mean.  I wonder if I should maybe print up the cards in a bold font to make it easier to see.  On the other hand, I mostly use the board with my friends at our meeting table where it is all perfectly easy to read.  For this year, I've decided it is what it is.  I just don't have the time to put in to redo all the cards.  It's something to think about for next year.

Do you have a FACEs board?  How do you use yours?  If you don't, any ideas on how to improve on mine?  I'm always open to suggestions!

On a totally different topic. . .  If you blog, how do you come up with blog titles?  Sometimes I try to jazz it up, as in "A Bit of a FACElift." but most of the time I just post the topic of the blog as its title.  Hence the exciting title of my last post, "Nonfiction Text Structure."  So, is it a downer when blog titles are basic and boring? 

Friday, November 4, 2011

Put on Your Reading FACE!

Yesterday, I posted about a writing board I have.  Today, I'm going to quickly tell you about a very similar board that I use for reading.  Get ready to, "Put Your Reading FACE On!"

Now, before I go any further with this, let me say that this board is totally adopted from The Cafe Book: Engaging All Readers in Daily Literary Assessment and Instruction by Gail Boushey and Joan Moser. 

In their book, they use the term CAFE.  In searching the web,  it seems that almost everyone that uses it does a cafe theme.  I had also seen the same set up using the term FACE instead and liked it a lot.  I don't have a cafe theme, so this seemed a better fit.  The Cafe Book is ahhhhmazzzzing!  I highly recommend it for anyone teaching reading.

I did make one small change.  As you can see in the picture below, the "A" originally stood for accuracy. 

Teaching a 5th grade enrichment class, accuracy hasn't been a huge issue.  My friends, for the most part, are advanced readers.  Don't get me wrong, as texts get more complicated we do continue to work on accuracy.  However, I quickly found that my friends really lack experience with non-fiction text.  They LOVE to read, but they don't seem to be overly interested in non-fiction.  We will be doing a lot of work with that this year.  Knowing that, I changed my "A" to Awareness.  It will really help us address non-fiction text structure, among other things.

I use the board during reading workshop almost exactly the same way I use my "Use Your Writing VOICES!" board in writer's workshop.  The big difference is that the FACES board is all about reading strategies.  Yeah, you probably already figured that out!  If you want to know more, you can click on the link above there to find out how both boards function in my room.

Tomorrow, I have another quick post coming on class rewards.  Stop by if you have time.  If not, have a great weekend!

Wednesday, October 26, 2011

Oh, How I Love Mr. George Baker!

Do you know Mr. George Baker?  To know him is to love him.


This is one of my favorite picture books.  It's about a man who is 100 years old and just learning to read.  He rides the bus to school with Harry, his 7 year old neighbor who is also learning to read.  They become good friends. It's a great book with an almost musical text. 

You will love Mr. George Baker and his friend Harry.

One of the reasons I love this book is because of how short yet strong it is.  Picture books are not usually simple, easy books.  They are often many pages with a good deal of text.  It can make it difficult when you want to do a mini-lesson with a book that doesn't take forever read.  I also like to read the entire picture book if I can, as opposed to just a few pages for the lesson.  That's what makes this book perfect.  It's a fairly short read with simple text, yet it carries a powerful message and can be used for so many lessons.  I love books that apply themselves to a variety of lessons! 

By the way, if you aren't using your picture books for multiple lessons, give it a try.  For example, I use Mufaro's Beautiful Daughters on and off all year.  It's another strong picture book that applies to many lessons.  However, it can be a long read in one sitting.  The boon is that once you have read the book, you can use it in future lessons reading only the parts that apply.  Your friends already know the full text, so they will be on board.  Not only does this make your mini-lessons more concise, the repeated exposure to the text will really be helpful to your friends.  You will find that the more you use the book, the more they will take away from it each time.  It's also important to revisit familiar texts for your lower students.  They really need the repeated exposure to sort of imprint the text in their heads so that they can begin to really focus on applying the strategies.  That's my Quick Tip!

Okay, time to get back on topic! 
If this were a writing lesson, wouldn't you totally be
telling me that last paragraph is off topic! :-D 

Here are a couple of ways I use Mr. George Baker in my class.
  • Making Inferences - This is how I used it this week.  We made a chart of Mr. Baker's description, actions, and dialog.  Then, next to it we made an inference for each section.  At the bottom of the chart, we combined them all in to a character sketch.   My friends knew from his physical description that he takes pride in how he looks.  They knew from his actions that he is a patient, kind, talented, and intelligent man.  They knew from his dialog that he has a sense of humor and values education.  This is all derived from some fairly simple text.  Save this chart because you can use it in the Show Not Tell lesson below.
  • Show Not Tell - In writing, I'm always trying to get my friends to show through action rather than just tell.  This is great to do after you're done the reading lesson on inferences.  It's also where revisiting a text pays off.  We've already read the book, so we can really focus on the author's craft.  I will bring out the chart of the inferences we made and ask how we knew all those things about Mr. Baker considering the author never really said any of that.  On the chart side that lists his description, actions, and dialog, we've already identified how the author shows instead of tells.
There are other lessons you can do with this book, but those are two of my favorites.  If you want to have a look-see, I found the Reading Rainbow episode where they read this book on You Tube.  Yup, it was a Reading Rainbow book.  If that's not a good recommendation, I don't know what is!  I've embedded it below.  The actual book reading runs from about minute 1:40 to 7:00, a little over five minutes. 

Enjoy!


See, I'll bet you also love Mr. George Baker now!


Monday, October 24, 2011

Self-Monitoring

So, I think I've mentioned that I've been in one school district, one school, for the past fifteen years.  For the fifteen years I have been there, we have used an anthology (ahhh, can you say basal?) reading program.  I never liked it.  In fact, I've always hated it.  It never seemed rigorous enough.  Luckily, I had a great principal that allowed me to toss the anthology and teach with novels. 

Ahhhhhhhhhhhhhhhhhhhhhhhh! Insert Snoopy Happy Dance Here!!!!!!

Well, in the past couple of years I've morphed into using the reading workshop model with my friends reading books of their choosing.  I love it, but I work in a district that still uses an anthology.*  With no specific curriculum to follow, other than the district's and state's standards that must be met, I've had to build my own.  This is where the web has been invaluable.  By putting what I find out there together with what I know, I can say it's been going well. 

Last week, I did a lesson on self-monitoring.  It is a blend of a lesson I found online and the self-monitoring I've been teaching for years.   Now, I have to say that this is not the original anchor chart.  The original chart was made with my friends and was super messy not so neatly done.  I found that this is a chart we refer to often.  It was a chart I knew would hang in my room for a while, so after school one day I remade the chart to be way less sloppy a bit neater.  

I think self-monitoring is an important lesson. The first thing I do is ask if anyone has ever been reading a book and suddenly realized that they had no idea what was going on.  Everyone can raise their hand on that one, teacher included.  We then discuss how readers self-monitor to keep  meaning.  I find my most able readers do most of these unconsciously, while my getting there readers have no idea they should even be doing these things.  For my getting there readers, this is an anchor chart that often comes up during individual conferencing.  It takes a while for them to internalize these behaviors, so we briefly touch on one or two of them during most conferences.

To explicitly explain what these self-monitoring techniques are and how they help us as readers isn't enough though.  This is where the constant modeling comes in.  With any read aloud or shared reading we do, I'm sure to ask one, two, a few of these questions as I read.  It may not be the focus of the mini-lesson, but I want them to see that good readers constantly self-monitor.  It's also a great time to model how self-monitoring helps you make deeper connections to the text. 

Since this chart is going to be up for a while, I decided to hang it up on the wall.  Do you see it?

No?  Okay, look a little closer.


Yeah, I was up on a six-foot ladder after school last week hanging that chart.  You can bet that's one chart that won't be coming down for a while! 

*I should note that my district has been making some major changes in it's literacy program and is slowly implementing the reading workshop model over the course of this school year.  It's not been easy to take a school so firmly entrenched in an anthology to a workshop model, but I can tell you my coworkers are true superstars.  They are working so hard and doing great things!

Saturday, October 15, 2011

My Reading Notebooks

This year, I revised the materials in my reader's notebooks.  I'm using a combo of a binder and a notebook for reading workshop this year, and I'm not 100% happy with it.  I thought I would share some of what I've been doing.  Maybe you can help me tweak.

Let me first tell you how I've been working it.  In their binder, they have a section for anchor charts and handouts.  There's an index where they write the title of the paper so they can see at a glance what they have.  It' sort of like a mini version of my anchor chart binder, but they have only the few charts I give the entire class and the ones I give specifically to them as needed during conferencing.  There's also a section in their binder to keep track of books they have read, books they want to read, and a genre tracker.

Now, the notebook is more of our workhorse.  The notebook is where they take notes during mini-lessons, jot their thinking about their independent reading, and write their weekly letter to me for assessment.

These are the notebooks I use.  I got them at Staples during the ten cent sale.  My friends turn their notebooks in one day a week.  This way I only have to read 4 or 5 a day rather than all 24 at once.  As you can see, orange notebooks are due on Tuesdays.

When you open the notebook, you will first find this page:


I think the note is pretty clear.  Our focus this year is all about thinking deeper about our reading.  The next couple of pages give an example of friendly letter format and how to edit/proofread their letter.

We edited "idea chart" to read "thinking stems"
Next, there are facing pages that have the "thinking stems" we use.  A reader had asked me to post a link to these, but I just can't find it.  I pulled these pages from a file I've had for a few years.  I know I originally found them on the web, but when I tried to find them again this year I couldn't.  If you have ever run across these, please let me know where so I can credit the author.
This is glued on to the left page of the notebook.  The other pages is on the right side.  I like them facing each other so they can see it all at once.

For some reason, I took two half-page pictures of the other page,
Update! (7/22/12)   Special thanks to Marilyn who emailed me the link she found for these Thinking Stems.  This link should take you to a Word document you can print out.  I believe they are from the Calhoun School District, but again not sure.  CLICK HERE TO GO TO DOCUMENT.

These thinking stems are good for helping my friends who have difficulty coming up with something to write.  I used them as a springboard when I modeled writing a reading response letter not just once, but twice for my friends. I will do more modeling of this as time goes on and I expect more from their letters.

After these pages, I still have two blank pages.  One is for a rubric that I have yet to put in their notebook.  That's one of the things I've not yet figured out to my satisfaction.  While the kids know what I'm looking for,  I want a rubric in their notebook. The problem is I can't find one that fits exactly what I want and I've been too lazy busy to just sit down and make my own.  I guess I'm going to have to just do it this weekend.

The rest of their notebook is filled with notes from our mini-lessons, their independent writing about their reading, and their weekly reading response letter to me.  It's actually all working pretty well so far, but I just have this gnawing feeling that I'm missing something. So, I'm throwing it out there to you! 

What are you doing with your reading notebooks?
What do your friends do with their notebooks?
Do you use a rubric? 
What and how are you assessing them? 
What's worked for you?


By the way, don't forget to ENTER MY THANK YOU GIVE AWAY!  There are only about 22 or so entries thus far, so the odds are pretty good!  You have also been leaving some great ideas for picture books to use in mini-lessons.  Click over and check out the comments.  Even if you don't enter, you will get some great picture book suggestions.